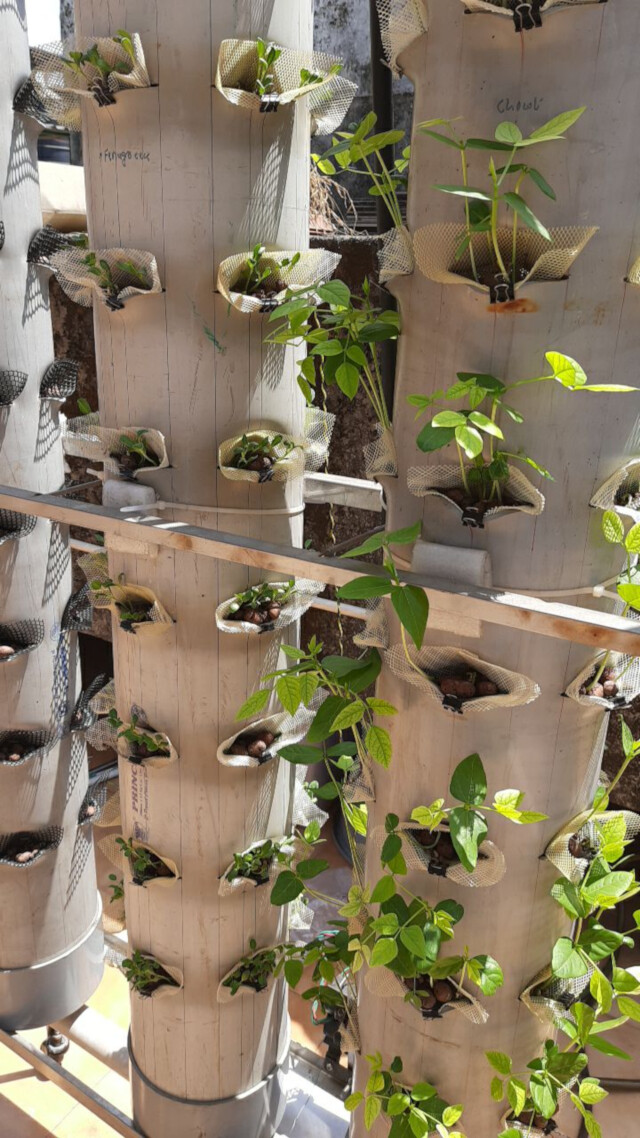
Plants growing ok. Without any nutrition some leaves began to show a light green shade. This indicates nitrogen deficiency.
I had already on hand a novice nutrient solution set. It consists of 3 bottles with different concentrations of NPK and micro nutrients. Such solutions will have a number such as 5-0-0.
The number shows the volume of N, P and K in the solution. The bottles I have are
N 5:0:0 ie N=5v/v P=0 K=0
P 1:6:0 ie N=1 P=6 K=0
K 4:0:1 ie N=4 P=0 K=1
Mixing all 3 equally in water will give you a solution with 10:6:1 ratio of NPK.
The pH for each solution is stated as N 4.6, P 4.45 and K 4.71.
Additionally the N solution contains Ca, Zn, Cu, Mn, S, Silica
The P solution contains Fe and B
The K solution contains Mn, Ca, S
The concentrations of these additional elements are not specified. Nor is the nature of the chemicals having these additional elements specified.
The amount of fertilizer - ie dissolved salts - in the water is measured by measuring the conductivity of the solvent. It is supposed to be ideally set at $1500uS$ for best absorption. Note that the measurement merely measures conductivity as a proxy for the above dissolved nutrients. IF one were to dissolve NaCl one can easily get the above reading without any of the plant nutrition.
Most vegetable Plants require a pH of 6-7.5 to absorb nutrients efficiently.
Ideally one should start with deionized water with pH of 7. Water from a RO filter can be used. However my setup uses tap water. The pH of my tap water is 7.5 and the EC value was $200uS$.
Mixing 10ml each of the above solution in 1 li of tap water changed the EC to 1500 and pH to 6.8.
We now have a fair idea of the mix ratio. My tank hold 7li. So approx 70ml of each should get me an EC and pH in the required range. Mixing 70ml into the tank produced the desired results.
A day later the pH rose to 8.2 and EC dropped to $700uS$.
Adding 40ml of NPK raised EC back to 1600. But pH dropped to only 7.5. We added 3ml of lime juice, which dropped the pH to 7.2. We continued adding a few drops of lime juice until pH reached 6.5.
Today I measured EC again. It had again dropped to $700uS$ and pH to 8.5. Which means the plants are absorbing the nutrients. Repeated the previous days process, but replaced lime juice with apple cider vinegar.
The liquid nutrient solutions are way more expensive than solid nutrients - we are paying for water.
The nutrient mix compositions revealed by the all knowing google/duckduck have innumerable recipes. Will have to read more on the topic.
MEasuring pH and EC everyday is a bit of a chore. Would be nice to automate the measurement and nutrient adding. I will require 4 containers with N, P, K and micronutrients and 4 dosing pumps. I will also require pipes and valves for routing nutrients to appropriate towers depending on what is planted and it’s growth cycle.
Fun days ahead.
One potential problem in hydroponics is reduced nutrients down stream.
Here, the flow being vertical, shadow areas might cause reduced growth
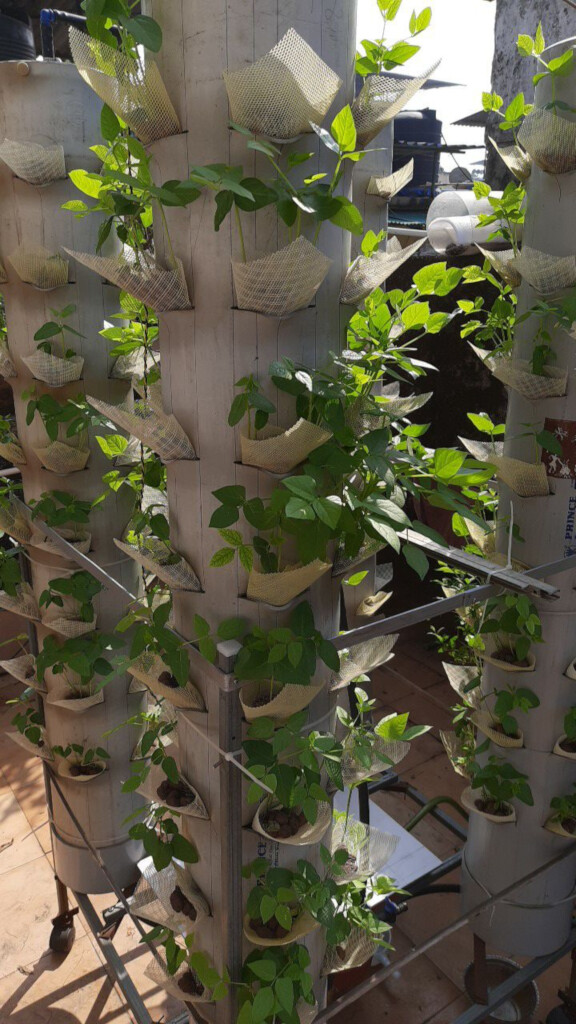
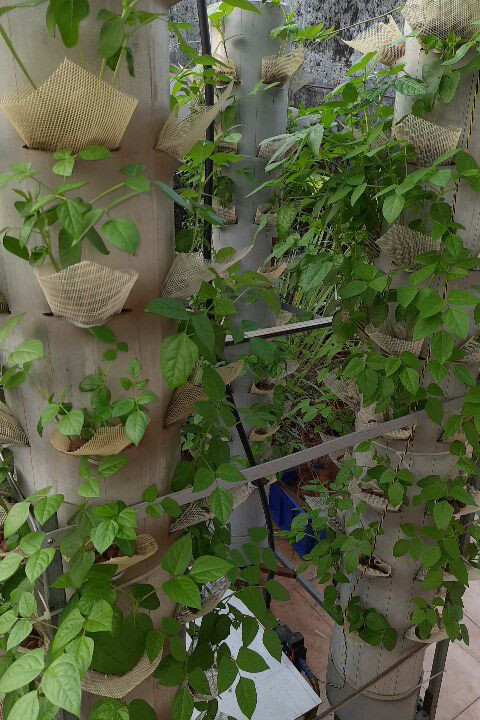
However growth is even. The variation seen is due to different days of planting.
Stalks have a larger dia and leaf size is larger than what is available in the market.
We also notice that EC drops by approx $500uS$/day and pH rises by 1 from 6-6.5 to 7-7.5.
However pH rises during strong sunlight hours faster. Consequently one needs to add acid more regularly than once a day. I am using acetic acid to keep the ph in the required range of 6-7. If pH value rises nutrient absorption will not be optimal, resulting in lower growth.
Harvested 2.1Kg (+ - 40mg digital scale jumping) of chowli.
@Pneb : approximately 50% yield and 20% grow holes empty, the harvest is a huge surplus. I wish I could have shared the spoils of the harvest with ye folks!!!
Note: The empty grow holes were either left deliberately empty or were planted with mint stalks / coriander, none of which sprouted. AS posted in the previous posts we planted 10 seeds in each hole. Most sprouted 5 through the grow hole and 5 inside the tower which die due to no sunlight and continuous water. A few had all 10 sprouting out through the grow hole, which is the desired outcome.
@vvcstemplay:
How many days from planting to yield?
I suspect the yield rate might not be much different from a field. In a real field, it is very difficult to assess the rate in the first place. The nearest metered comparison can only be to a soil based potted plant nursery.
JT D, [22.01.21 17:00]
[In reply to VicKram Crishna]
15 days.
The quality is very very superior compared to a market purchase. I estimate that one could obtain 5.25 kgs once we correct the primary problem of preventing plants growing inside the tower. The floor space used for this yield, including service space is 10sqft.
We estimate that 100sqft of floor space can fulfill our weekly vegetable needs. However given the variety we consume and the differing growth rates we will require double that area to be almost self sufficient. Additionally due the peaky nature of yields one will have to “discard” about 30%.
The present harvest would have lasted for 6 meals for us. Probably 4 meals for heavier eaters.
Operational Cost wise this rig consumed 12.9 units of electrical power, approx Rs.305 @p Rs.8.5/KWH. One could optimise it to probably 8 units by reducing duty cycle based on ambient temperature and humidity. This is probably 10 times more than a field, whose power is subsidised and thoroughly undependable.
Growth wise We can compare stem dia v/s leaf size. Punit estimates the aeroponic leaves to be 40% bigger keeping stalk dia constant.
Fertilizer consumed: N 10mg P 6mg K 4mg, micronutrients unspecified. All these in 3 100ml bottles of exorbitantly priced premix solution costing Rs.499. Commercial NPK 202020 costs Rs.60/kg or 200 time cheaper than the solution I used.
We decided to harvest before fruiting so that we can correct all the issues that inhibit even better yields. According to our house help - who also has a small farm somewhere in maharashtra - one does not pluck out the whole plant. But snip off some portion leaving larger leaves intact, thereby permitting some harvest while allowing the plant to grow to maturity.
Black ants were crawling amongst the leaves. Some insects too showed up. Shiny black beetles about 2mm in dia. Butterflies visit the terrace. As do some wasps and bees. I am sure nature’s creatures with sensors that we barely understand will detect signals from the flowers and show up at opportune moments.
I suppose indoors would be a problem. Perhaps having greenery filled balcony and windows will draw insects who will then discover the indoor larder too. Instead of venetian blinds we should have plantation sights on the window.
I suspect that far too many varieties of insects have appetites and habits that make them unwelcome residents in a home.
Plants and flowers present a visual appeal, but other than that, what exactly is the value addition? In tropical countries, we don’t even want more than very limited sunlight inside the home.
Prior to the development of vertical cities, homes had a different balance of inside/outside in the architecture. That allowed for either home/kitchen gardens or home animal husbandry.
The relationships of home economics and industrial/society economics are in conflict. Probably calls for a different thread.
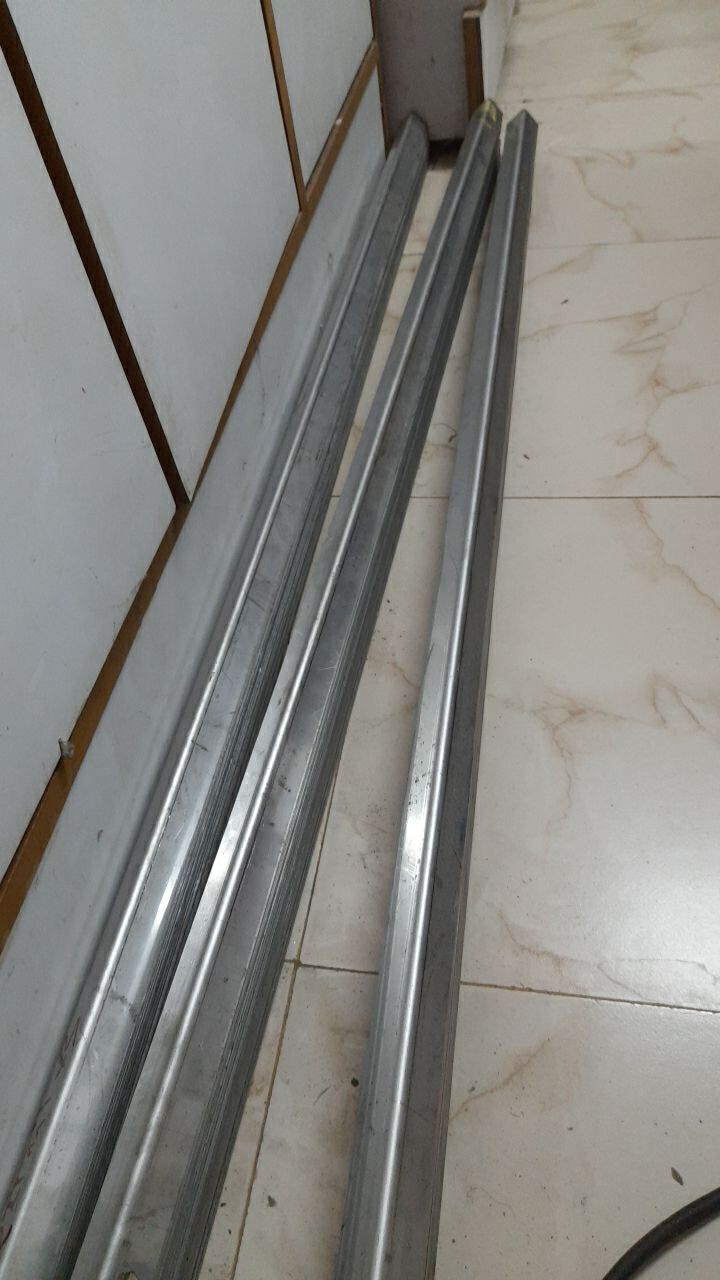
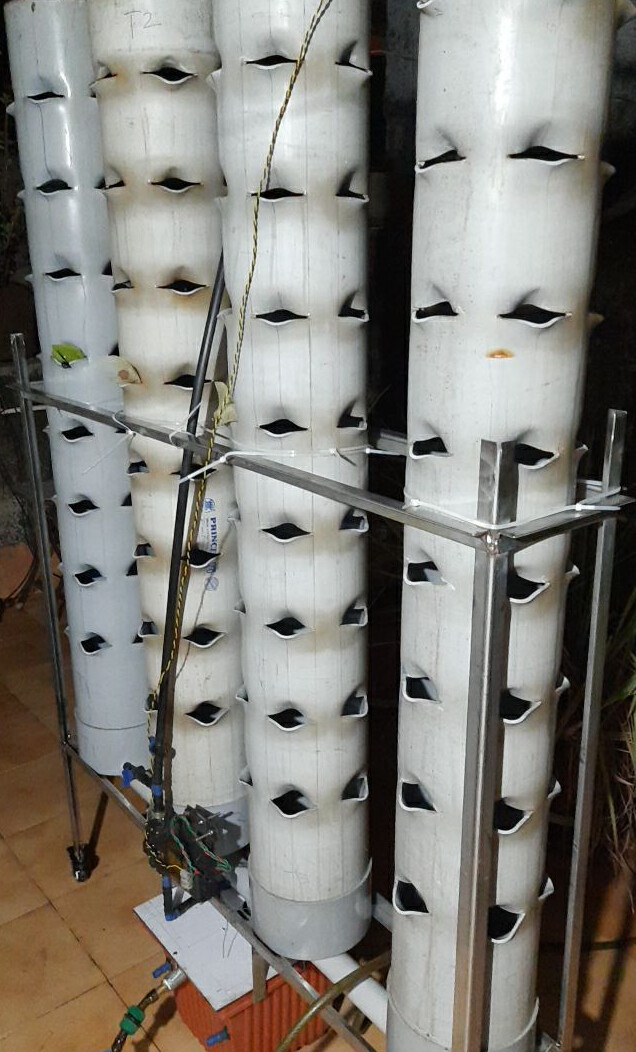
To further improve the setup, reduce costs, labour, floor space and maintenance we decided to use stainless steel for the frame.
I procured 125mm x 25mm x 2mm SS304 L angle. Price is per Kg and varies from Rs.200 to Rs.220 per Kg. Each angle weighs 915 grams. Each frame will use 730cm odd, will hold 14 pipes with 224 grow holes -All tentative as we are yet to actually design.
The market is locate in Kumbharwada, Gol Deval near Sandhurst road.
We will use reticulated foam inside the pipe to remove the need for high pressure pump, thereby drastically lowering our power consumption. The foam will act as a seed holder when initially planted - no need for germinating separately - as support for the plant and roots, and as a water diffusing media. The stuff is expensive at Rs.0.0454/cc.
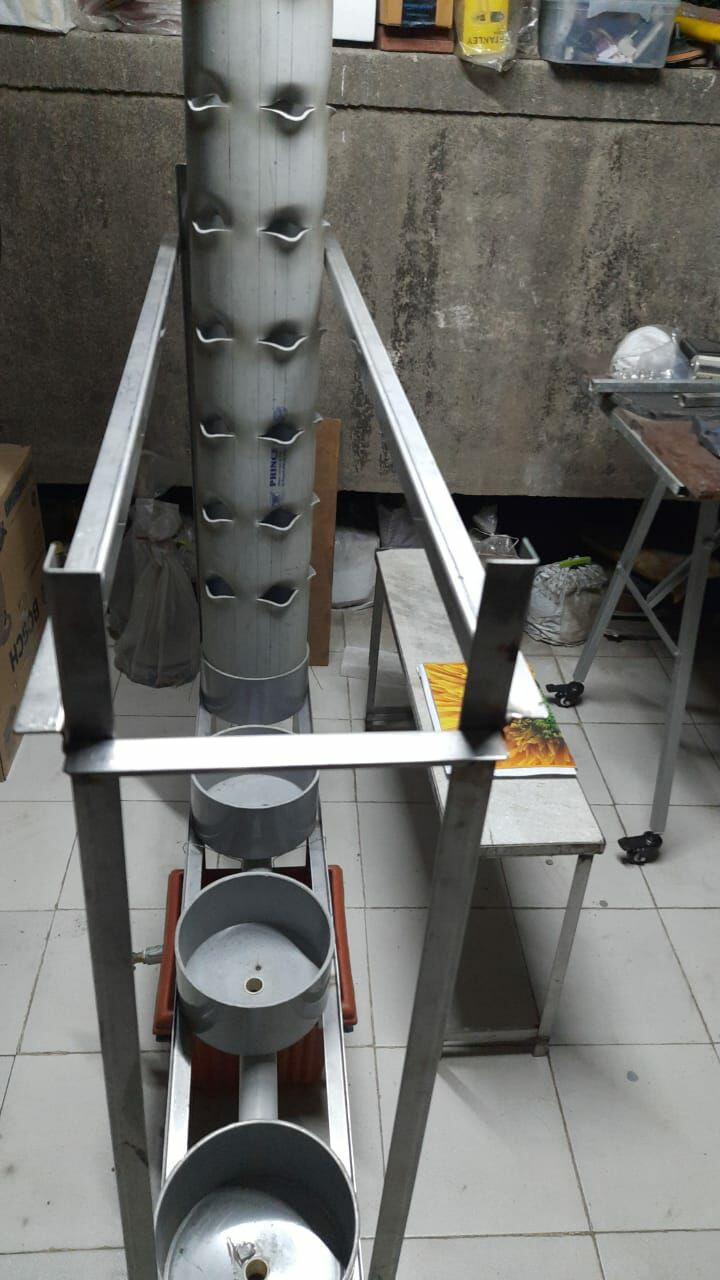
Instead of 8" pipe used in the previous setup, we will use 3" pipe with grow holes on the front and back. 2 strips of reticulated foam will cover the inside of the pipe where the grow holes are located. Water will drip on the top of the foam and flow down from an overhead tank. Overflow will accumulate in a sump tank and pumped up to the overhead tank whenever the sump tank fills.
To solve the problem of growth inside the tower, seeds are anchored in reticulated foam. Given that phototropism - plant growing towards light - will direct growth, the outer side of the foam has clear access to light and the inner side to water and nutrients.
The pump has a “non standard” 16mm threaded nozzle. This nozzle would be common in rural areas, but is rare to find in cities. I could not find a correctly threaded coupler, so rigged up a joint in the last grow cycle. It worked. The pump orientation is now changed. This caused the joint to leak a little. So had to redo the joint. The leak is far lesser now. Will test it for a couple of hours. If it holds, planting will commence.
This version seems to solve all the previous issues and should be a permanent setup.
I will now commence Version 3 using 3" pipes to reduce costs and remove the need for high pressure pump. Water will merely drip the same way as was done in the alpha prototype in HBCSE.
Additionally inside the tower since roots tend to occupy lesser volume dangling vertically - albeit without any visible reduction in growth - it might be beneficial to provide some surface structure inside the tower so that roots occupy more surface volume. Presumably the larger spread will help plants that require more nutrients and better utilisation of the tower central volume. Essentially 90% of the internal volume of the tower is unused.
Reticulated foam is one filler material that fits the bill very well. However roots will grow within the pores and hence cannot be cleaned after harvest, hence will be one time use. This increases the cost.
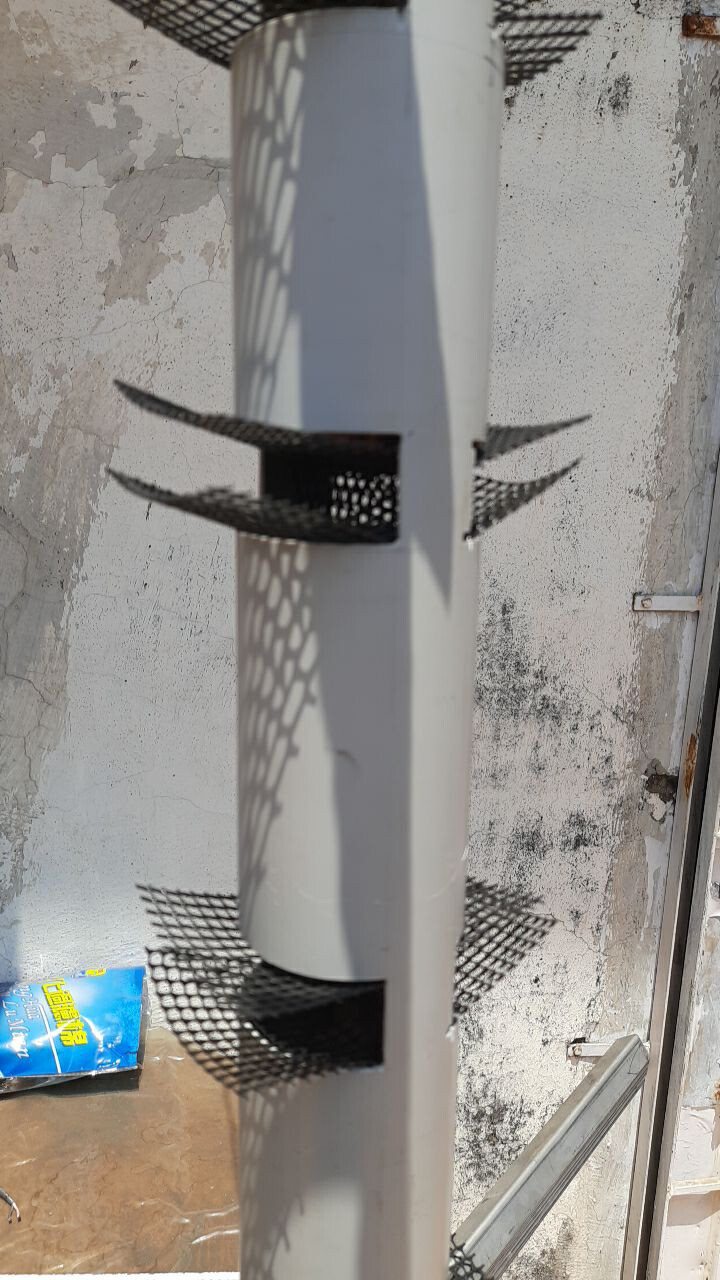
The second material is the same mosquito net. A layer or two rolled into a cylinder and placed vertically in the pipe should work. Such a roll can be cleaned and reused easily over multiple growth cycles.
Found out that rolling mosquito net into an evenly spaced spiral is a slooow process. Instead I did this:
Cut two windows in the pipe on opposite sides and inserted mesh bent into C shape. The net width is 5 mm larger than the chord of the cutout, thus anchoring the net in place. The rear of the net touch each other.
The current growth cycle has poor yields. The previous cycle tap water had a pH of 7. Consequently adding NPKM would keep pH around 6.7. I would add vinegar to lower the pH to 6~6.5, which is supposed to be ideal for absorbption.
I assumed that the pH of tap water would be the same and did not measure. Once sprouting started I checked and found the pH to be 8.5. I checked fresh tap water and it was indeed 8.5. Reverified calibration of meter and double tested with litmus paper. Tap water pH was indeed much higher. Consequently mainlining the pH at 6 requires constant infusion of acetic acid every 45 minutes. So, we must either setup an automated dosing system or use RO water, ideally both. This increased pH could be due to the primary source f water now being augmented from a different reservoir by the municipal authorities.
Additionally temperatures of $38^oC$~$40^oC$ has resulted in seedlings dying. To complicate matters the smaller netcups hold only a few clayballs and is at a much flatter angle resulting in soggy seed. Overall result poor yield. Only a few spinach and coriander seeds have sprouted so far. Fenugrek and black eyed beans fared much better.
Version 2 will require a canopy to reduce heat effects. A canopy can be easily added either to the stand or by rigging some clothes lines above the tower and covering with a sheet.
To our best knowledge, research on extracellular electron transfer processes in soil environments is limited and could provide novel knowledge and new ways of monitoring soil health. Electrochemical activities in the soil can be studied by using polarized electrodes. Our work aims to investigate the electrochemical behavior of healthy and unhealthy soils using chronoamperometry and cyclic voltammetry. We developed a bioelectrochemical soil reactor for electrochemical measurements using healthy and unhealthy soils. Using carbon cloth electrodes installed in these soil reactors, we explored the electrochemical signals in these two soils. First, we measured redox variations by depth and found that reducing conditions were prevalent in healthy soils. Current measurements showed distinct differences between healthy and unhealthy soils. Scanning electron microscopy images showed the presence of microbes attached to the electrode for healthy soil but not for unhealthy soil. Glucose addition stimulated current in both soil types and caused differences in cyclic voltammograms between the two soil types to converge. Our work demonstrates that we can use current as a proxy for microbial metabolic activity to distinguish healthy and unhealthy soil. https://iopscience.iop.org/article/10.1149/1945-7111/ac1e56/pdf
Since we already know that soil per se is not an absolute necessity for plant growth, the implication of this study is that it is microbes that do the trick.
Extrapolating, it would appear that a healthy liquid/aerosol diet for plant growth must nurture microbes. The described test facility can be used to develop an environmental testing process to monitor it.
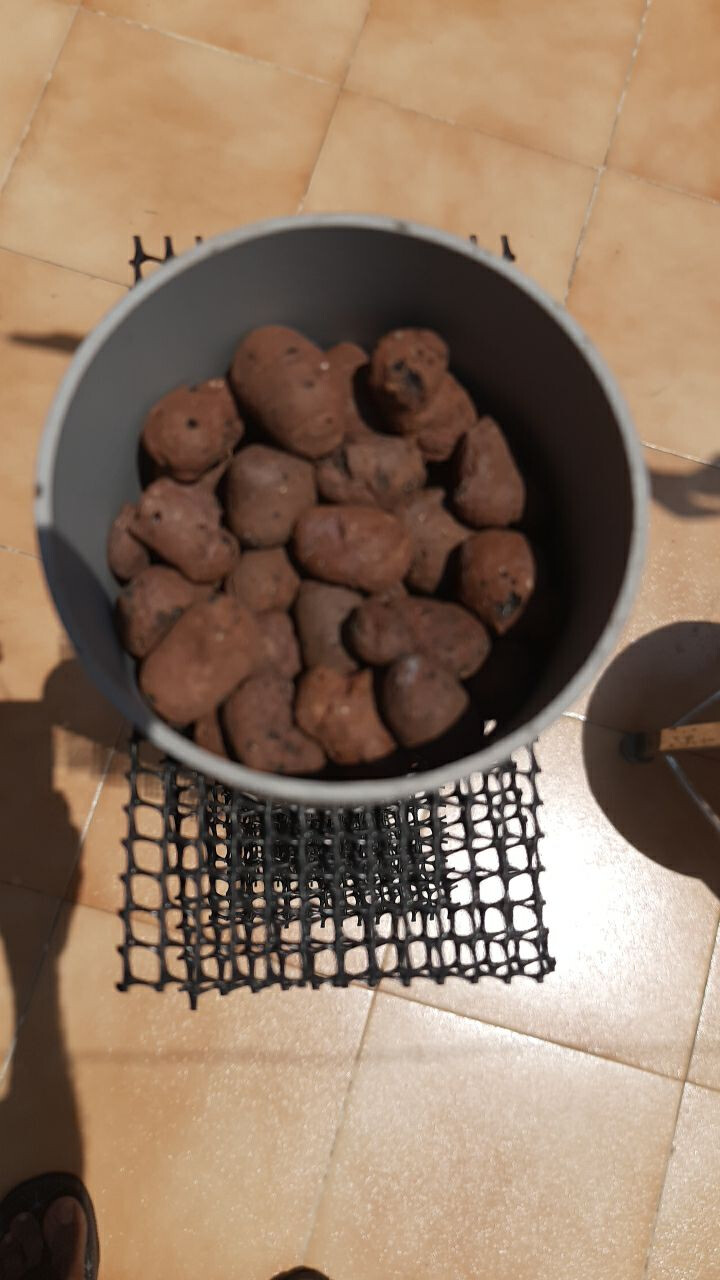
One of the sticky areas in vertical growing is providing a substrate for the roots to spread. The roots tend to clump or cling to the sides of the pipe. A porous material is a must, but must also be insoluble in water, should not clump, be easily cleanable and reusable after every growth cycle. The last two imply that the substrate must be low cost.
Open cell foams are one material that comes to mind. Open cell foams are used as AC filters and are available in different pore sizes. However it is expensive.
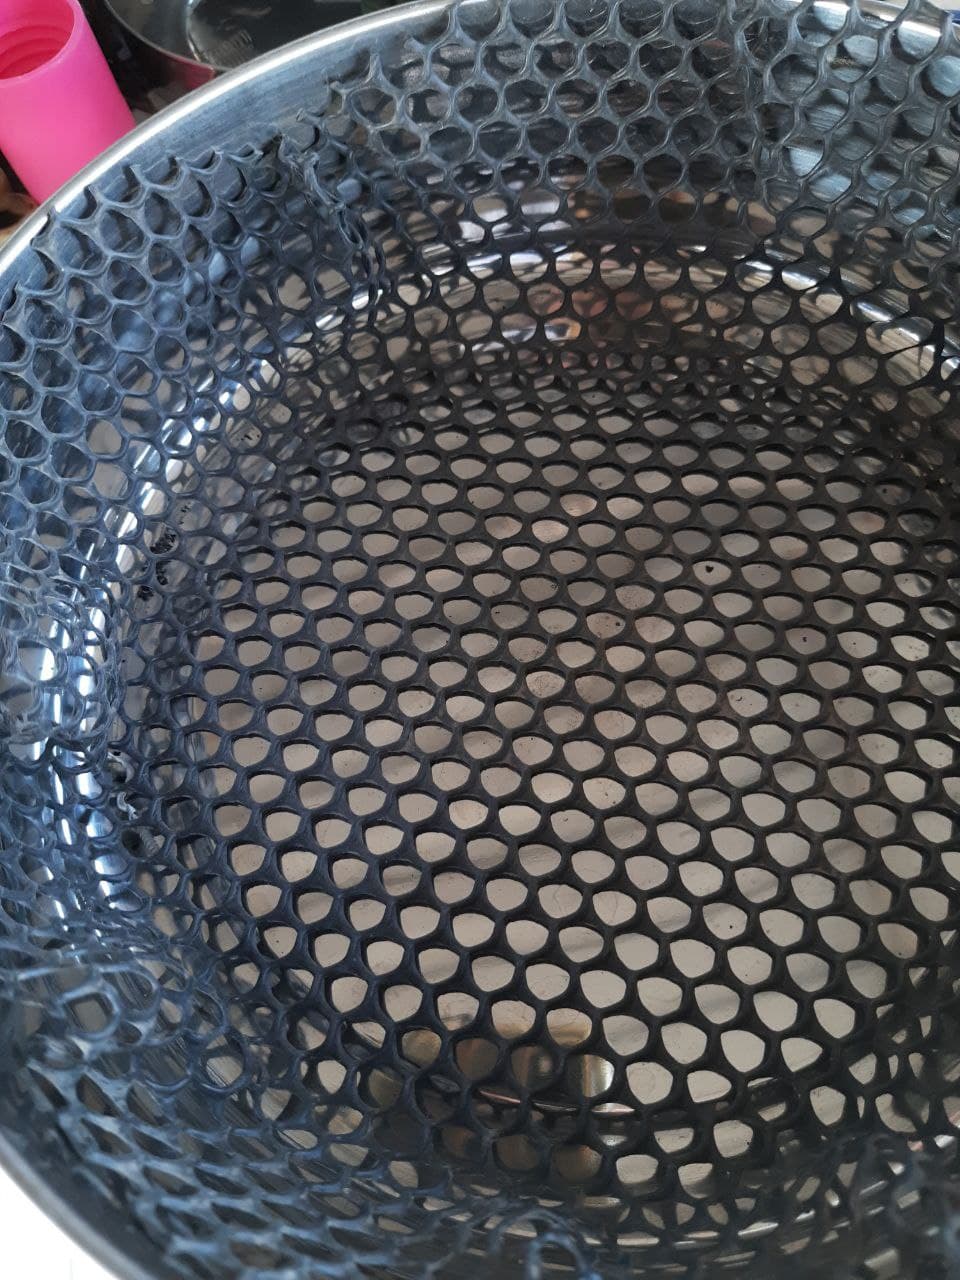
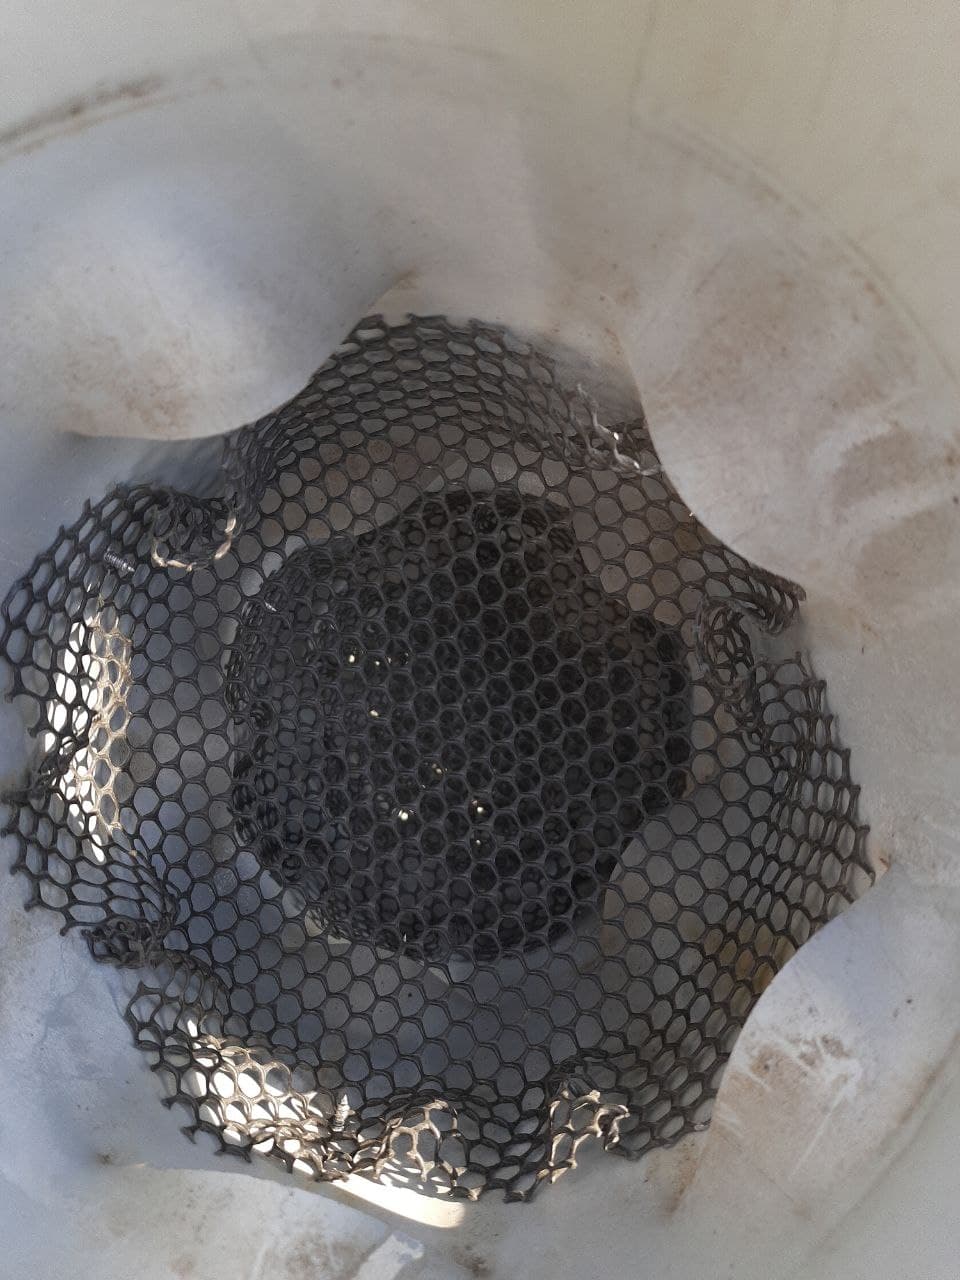
Based on the experience gained from the earlier efforts listed in the post, I changed the vertical tower internal structure to include a mesh. I choose to use bird netting. It is available at any hardware store and with different hole sizes and shapes. I choose a 7 mm hexagonal hole size.
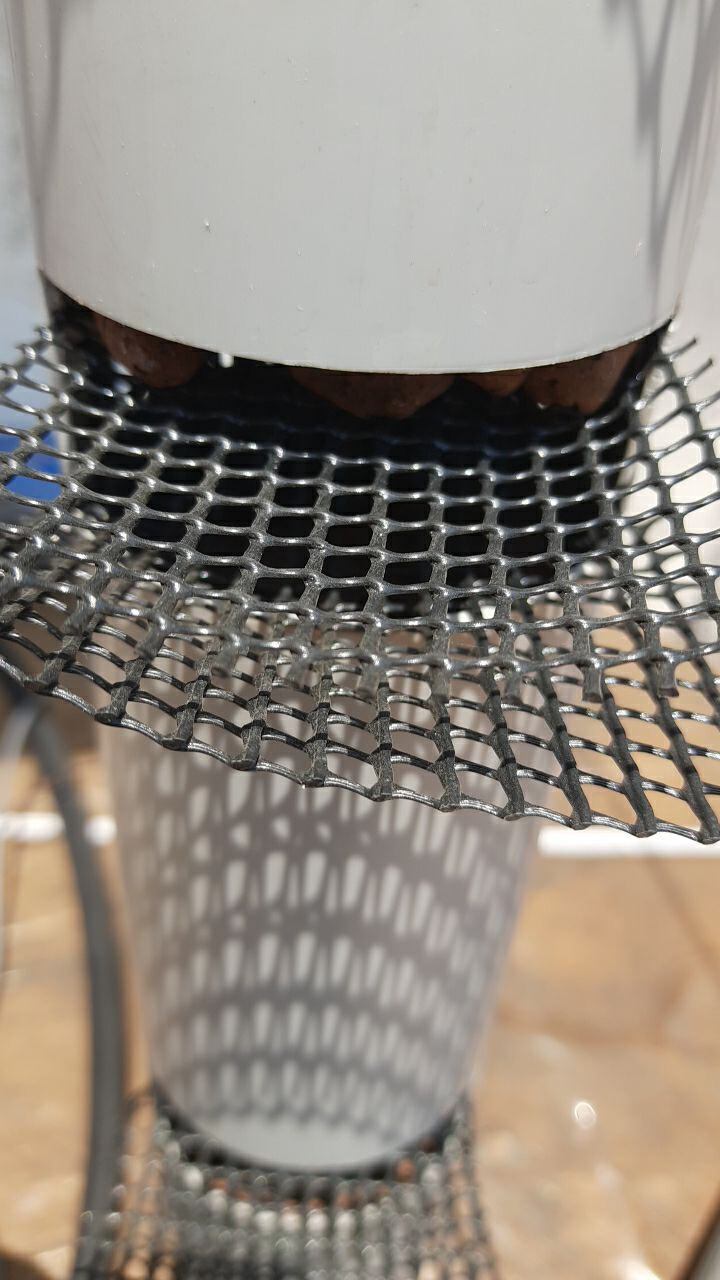
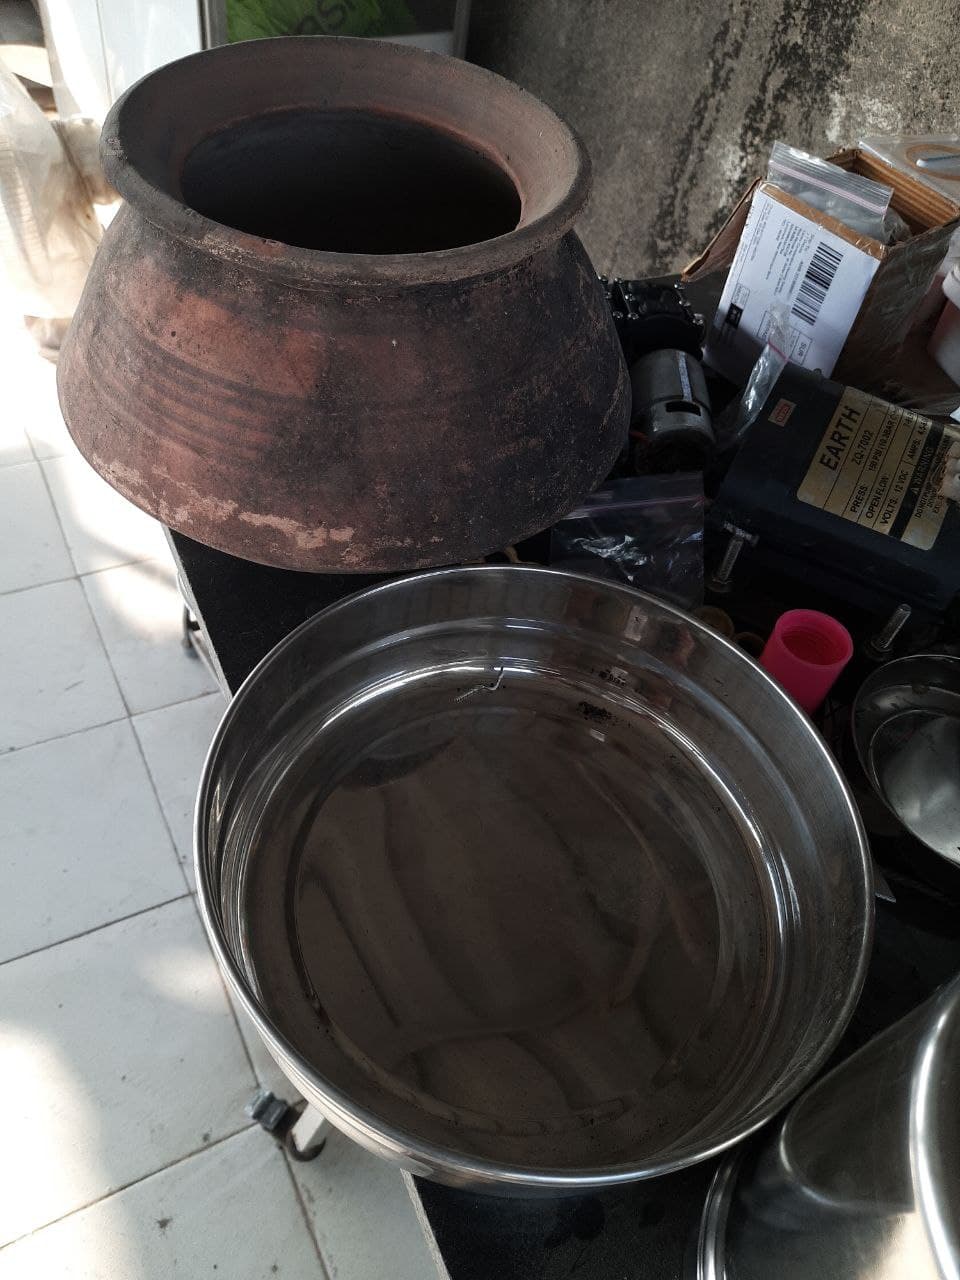
Forming the flat bird net into a bowl like shape will require a jig. I managed to find a kitchen container whose inner dia is 20 cm - the diameter of the pipe - and a clay pot whose rim is 18 cm.
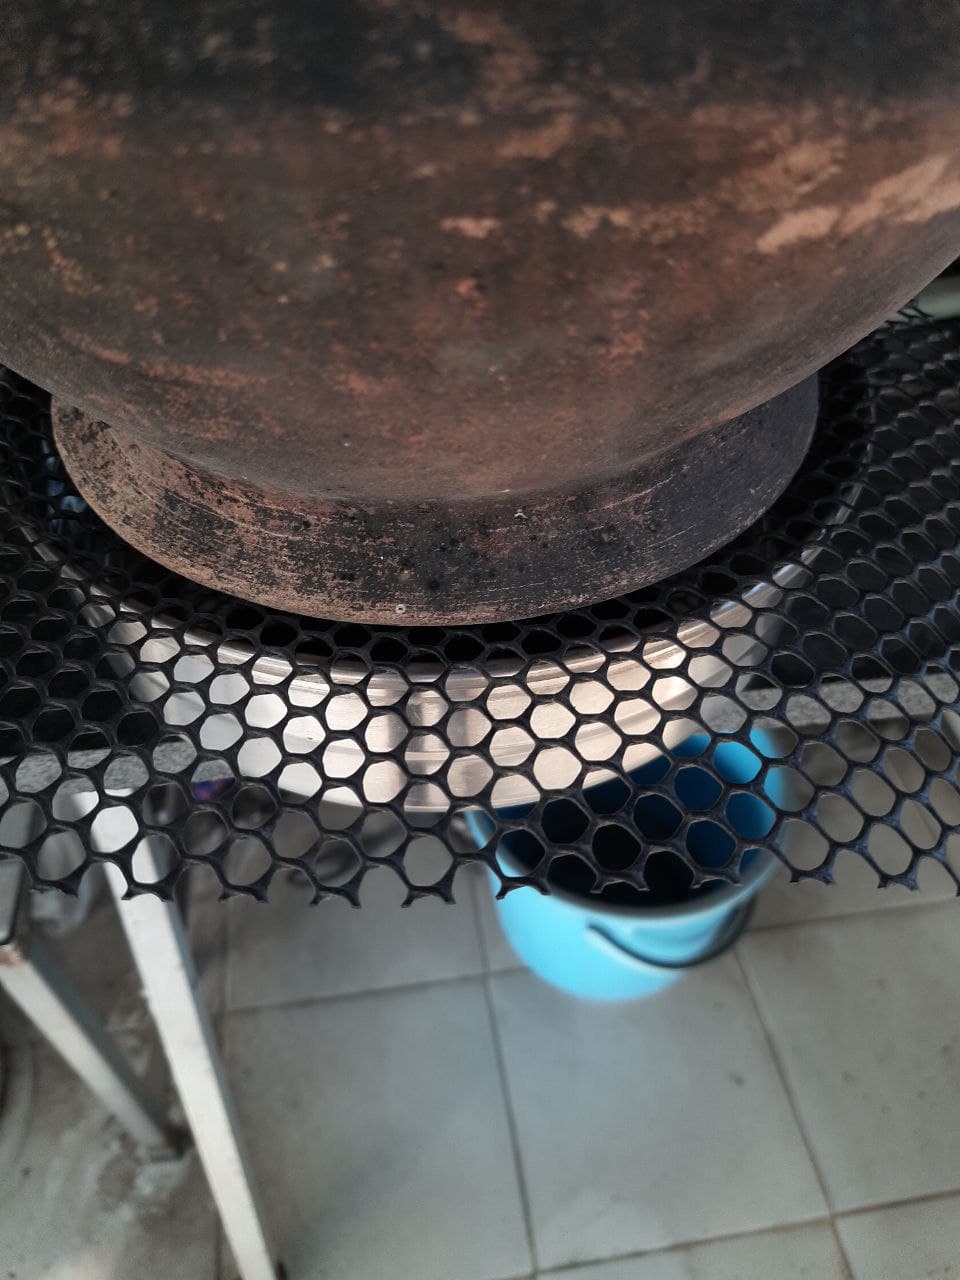
We cut the bird mesh approx 50mm larger than our pipe dia. Place the mesh on the kitchen container. Place the pot inverted on the mesh. Center it. Use a hot air gun to evenly heat the bird mesh around the neck of the pot.
The net softens and starts sinking with the weight of the pot. Lifting the heated mesh a little at appropriate points aids in the sinking and forming of the bowl. Once it has sunk about 15mm push the pot down. Make sure it does not tilt in any one direction, else your mesh bowl will have an odd shape that makes fitting in the pipe difficult. Remove pot.
Fit inside pipe 3-4cm below the grow hole. At first I used M4 machine screws with a nut and washer. This provides a solid grip on the net and would be ideal if one were growing potatoes or carrots, but getting the washer and nut to mate with the screw inside the pipe is a painful task. I switched to self threading screws. The screws are 25mm No.6. Two of the screw are visible at the top left and bottom of the image below. One will always have to use stainless, as the water, NPK and buffering acid will corrode non ss screws.
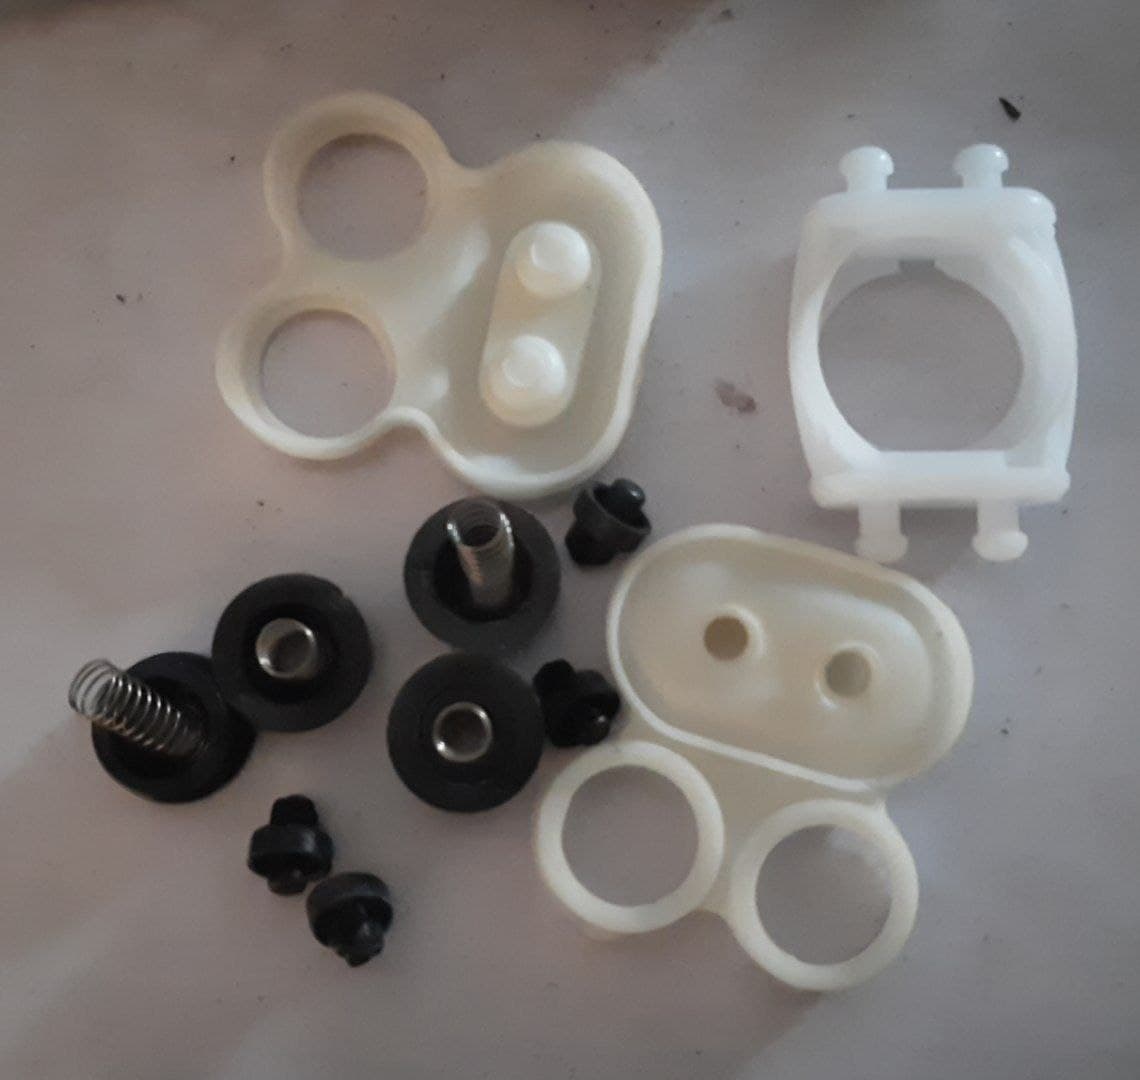
Starting the pumps was a non starter. One of the motors fails to rotate.
I opened the pump and found the rubber diaphragms had hardened a bit. This despite storing it in a sealed box. Plenty of youtube videos on repairing spray pumps. One of the bearings on one motor was jammed. Spraying WD-40 and rotating it bit by bit using a cutting plier freed it up. Once it was free added drop of oil. Quite often the bearing balls will be damaged. In such a case the bearing wont rotate freely and will also make clicking noises. This one has no such symptoms. So let’s presume it is ok.
I ordered a set of pump spares online. In rural areas these are easily available, but are almost as expensive as the pump online, and not available in Mumbai. At least I could not find it at Nagdevi street.
The pump motor has an eccentric cam that pushes the actuator (object on the right top) up and down. The diaphragms are push fitted on the actuators 4 projecting knobs - one on top and one on bottom. This cause the rubber diaphragms to move in sync and the valves to open and close, sucking and pushing water into small chambers and eventually through the outlet. As stated earlier in this thread, they develop a high pressure. The diaphragm moves only around 2mm. But with a rpm of 2400, and two motors that is 4800 or 80/S.
The repaired pump barely works at 25% of it’s capacity. So ordered a new one to save time. The new one arrived with one rubber mounting foot missing. So sent it back and ordered yet another one . That arrived yesterday with a hose pipe missing. So this one goes back too.
During repairs I used a mix of old and new parts. Given the pathetic performance it would be best to replace all the pump parts. Additionally all the tower pipes were cleaned thoroughly using steel wool. Root clumps that had clung to the sides of pipes came loose. Earlier while testing the repaired pump some debris and old dust collected in the sump tank. This must have made it’s way into the pump. So back to reopening the pump, cleaning it up and reassembling. A thoroughly boring task removing 28 screws. The good news is that the motors are spinning just fine after a bit of oiling.
Almost a year ago I had posted a link on inoculating plants with potassium fixating bacteria and a list of commercial fertilizer. The site also has a list of commercial micronutrients. I have already procured a small bag of NPK 19:19:19, which was an order of magnitude cheaper than the small bottles of liquid fertilizer with micronutrients. Now to get hold of micro nutrienst with similar cost benefit.
P.S. metastudio helpfully popped up a reminder of the above one year old post the moment I typed in cfquti. Nice to have metastudio keep track of stuff.