Initially we read and discussed the difference between aeroponics and hydroponics. Then we chose to build a hydroponic model as a part of MakerSpace workshop at IISER Pune.
One of the suggestions was building vertical, horizontal and drip irrigation - all three in one model.
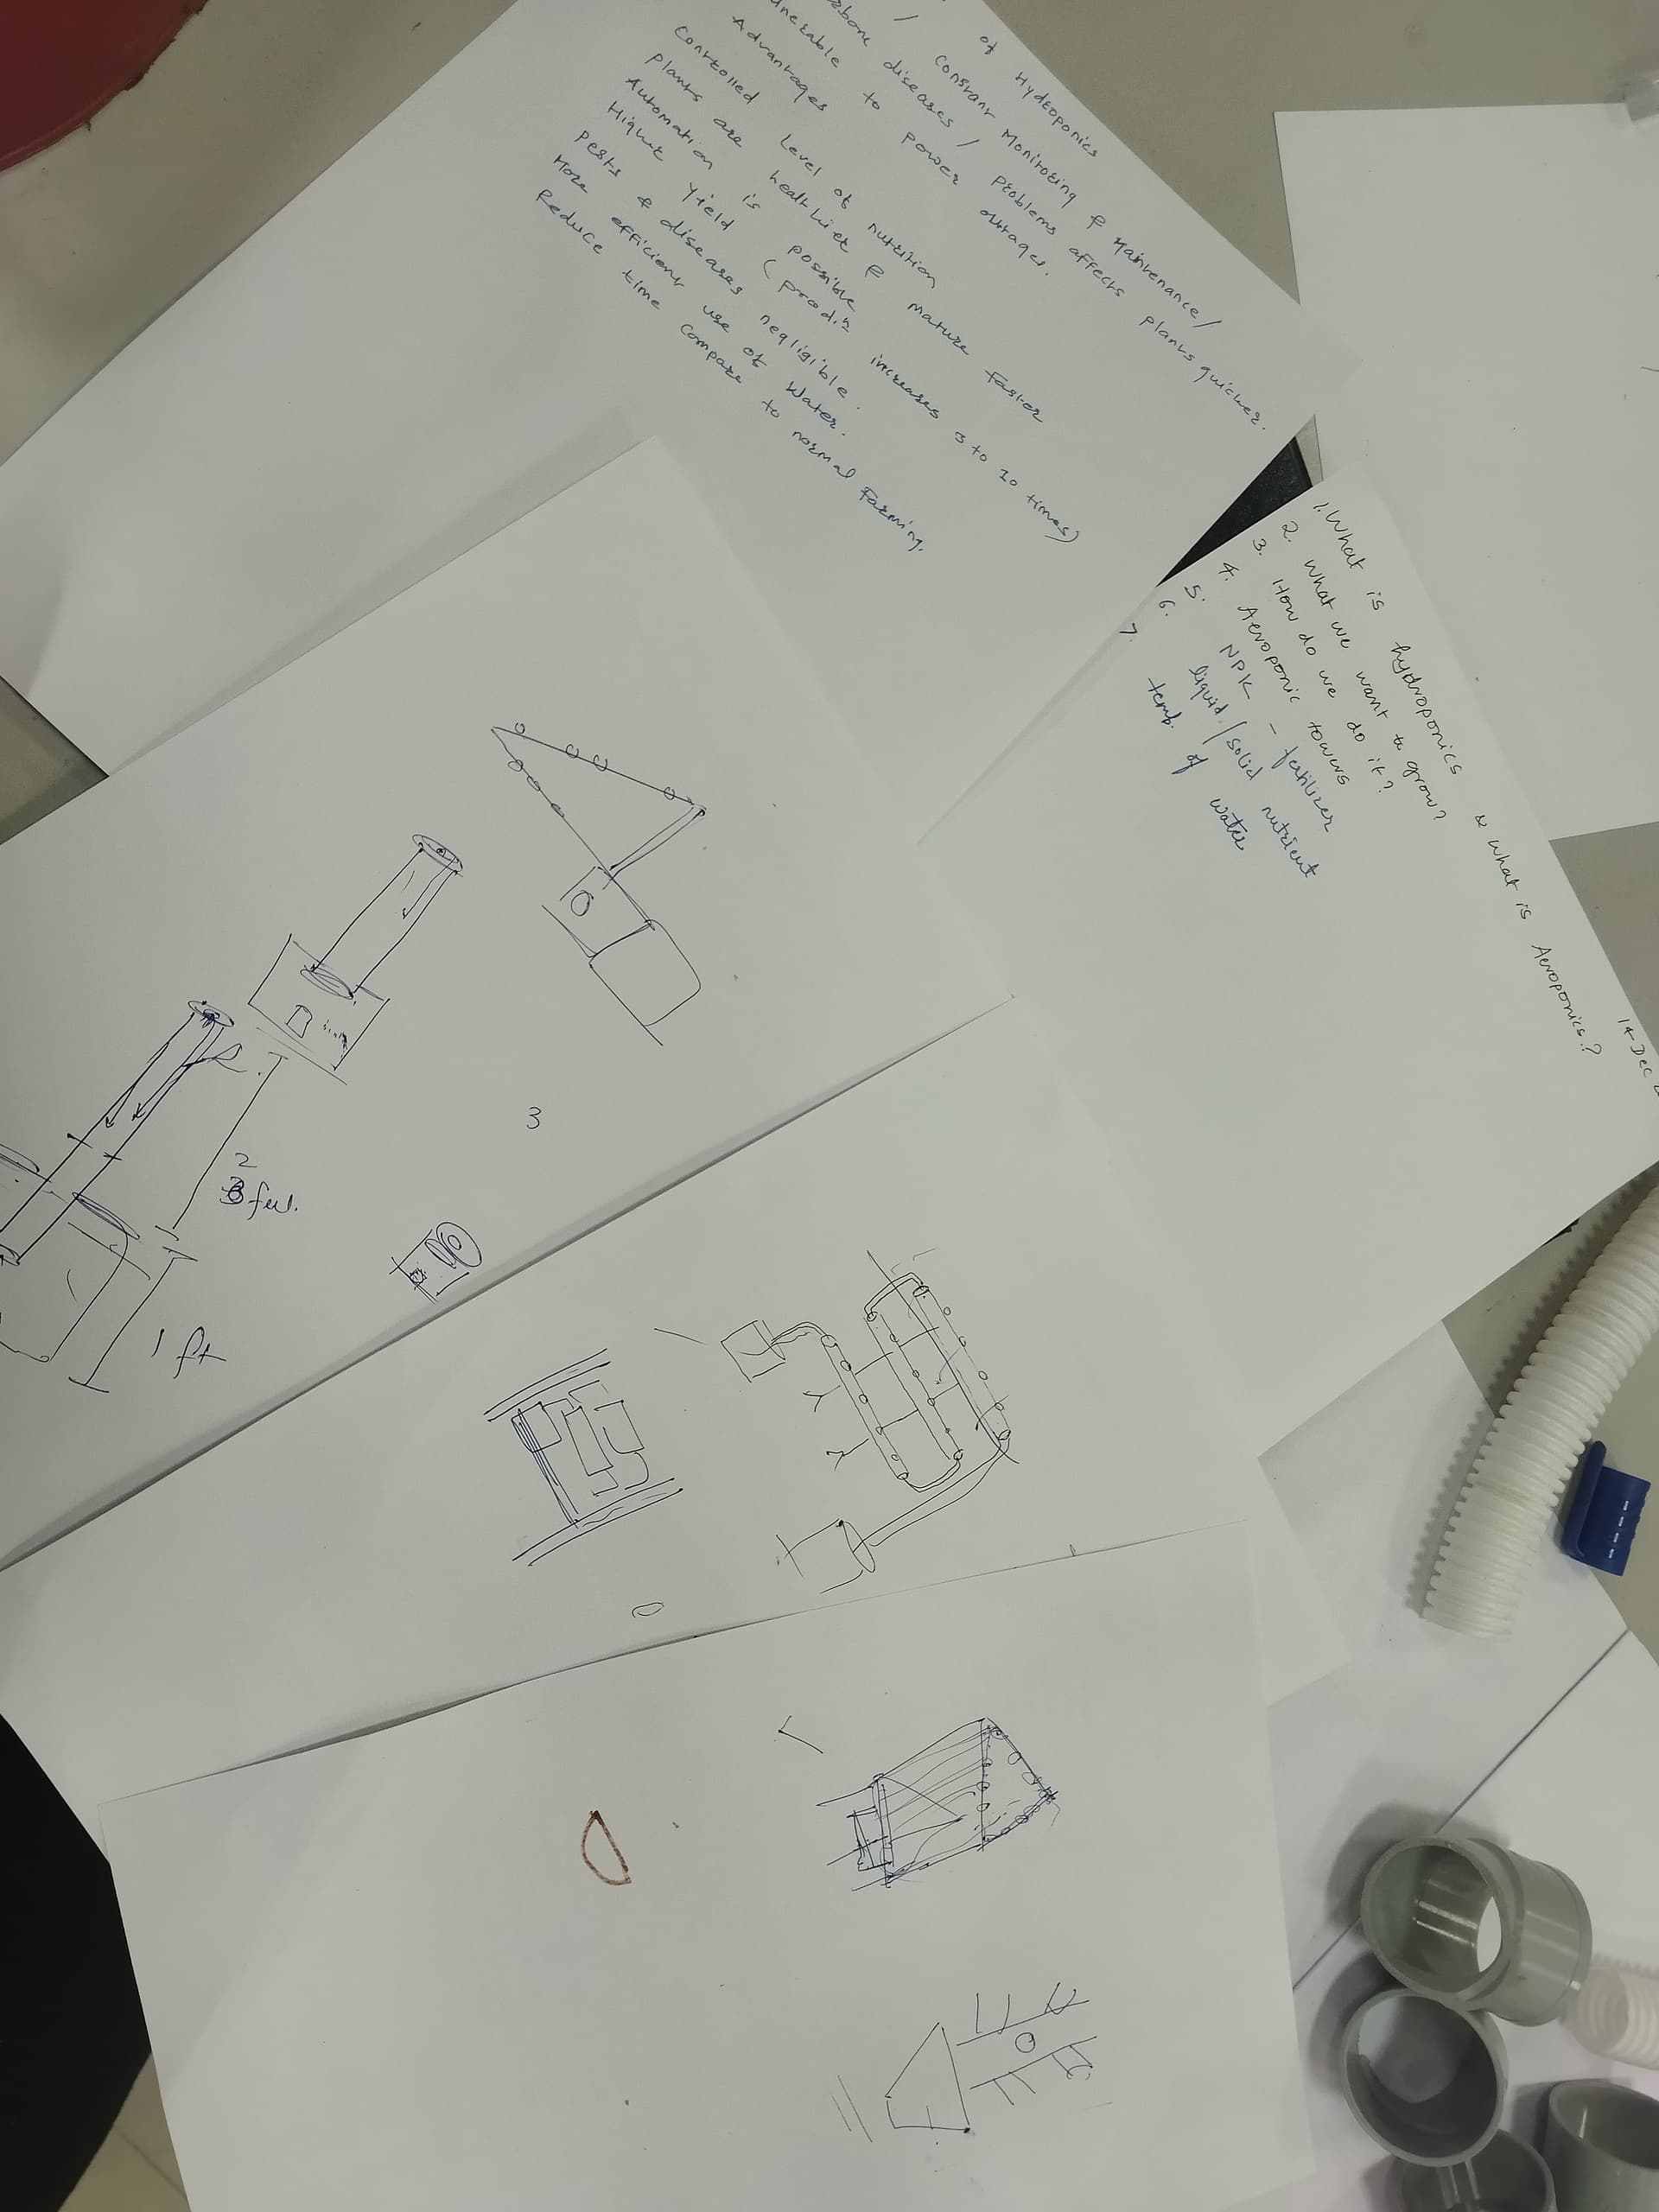
Here’s the rough design we came up with :
Later we took a PVC pipe of 5cm radius, tried to make holes on it so that we can use it for keeping net pots.
But there was a problem with this model. We couldn’t keep the net pots inside the holes we made and we thought roots would not get enough space for the growth . We had to think of methods to improve the current model
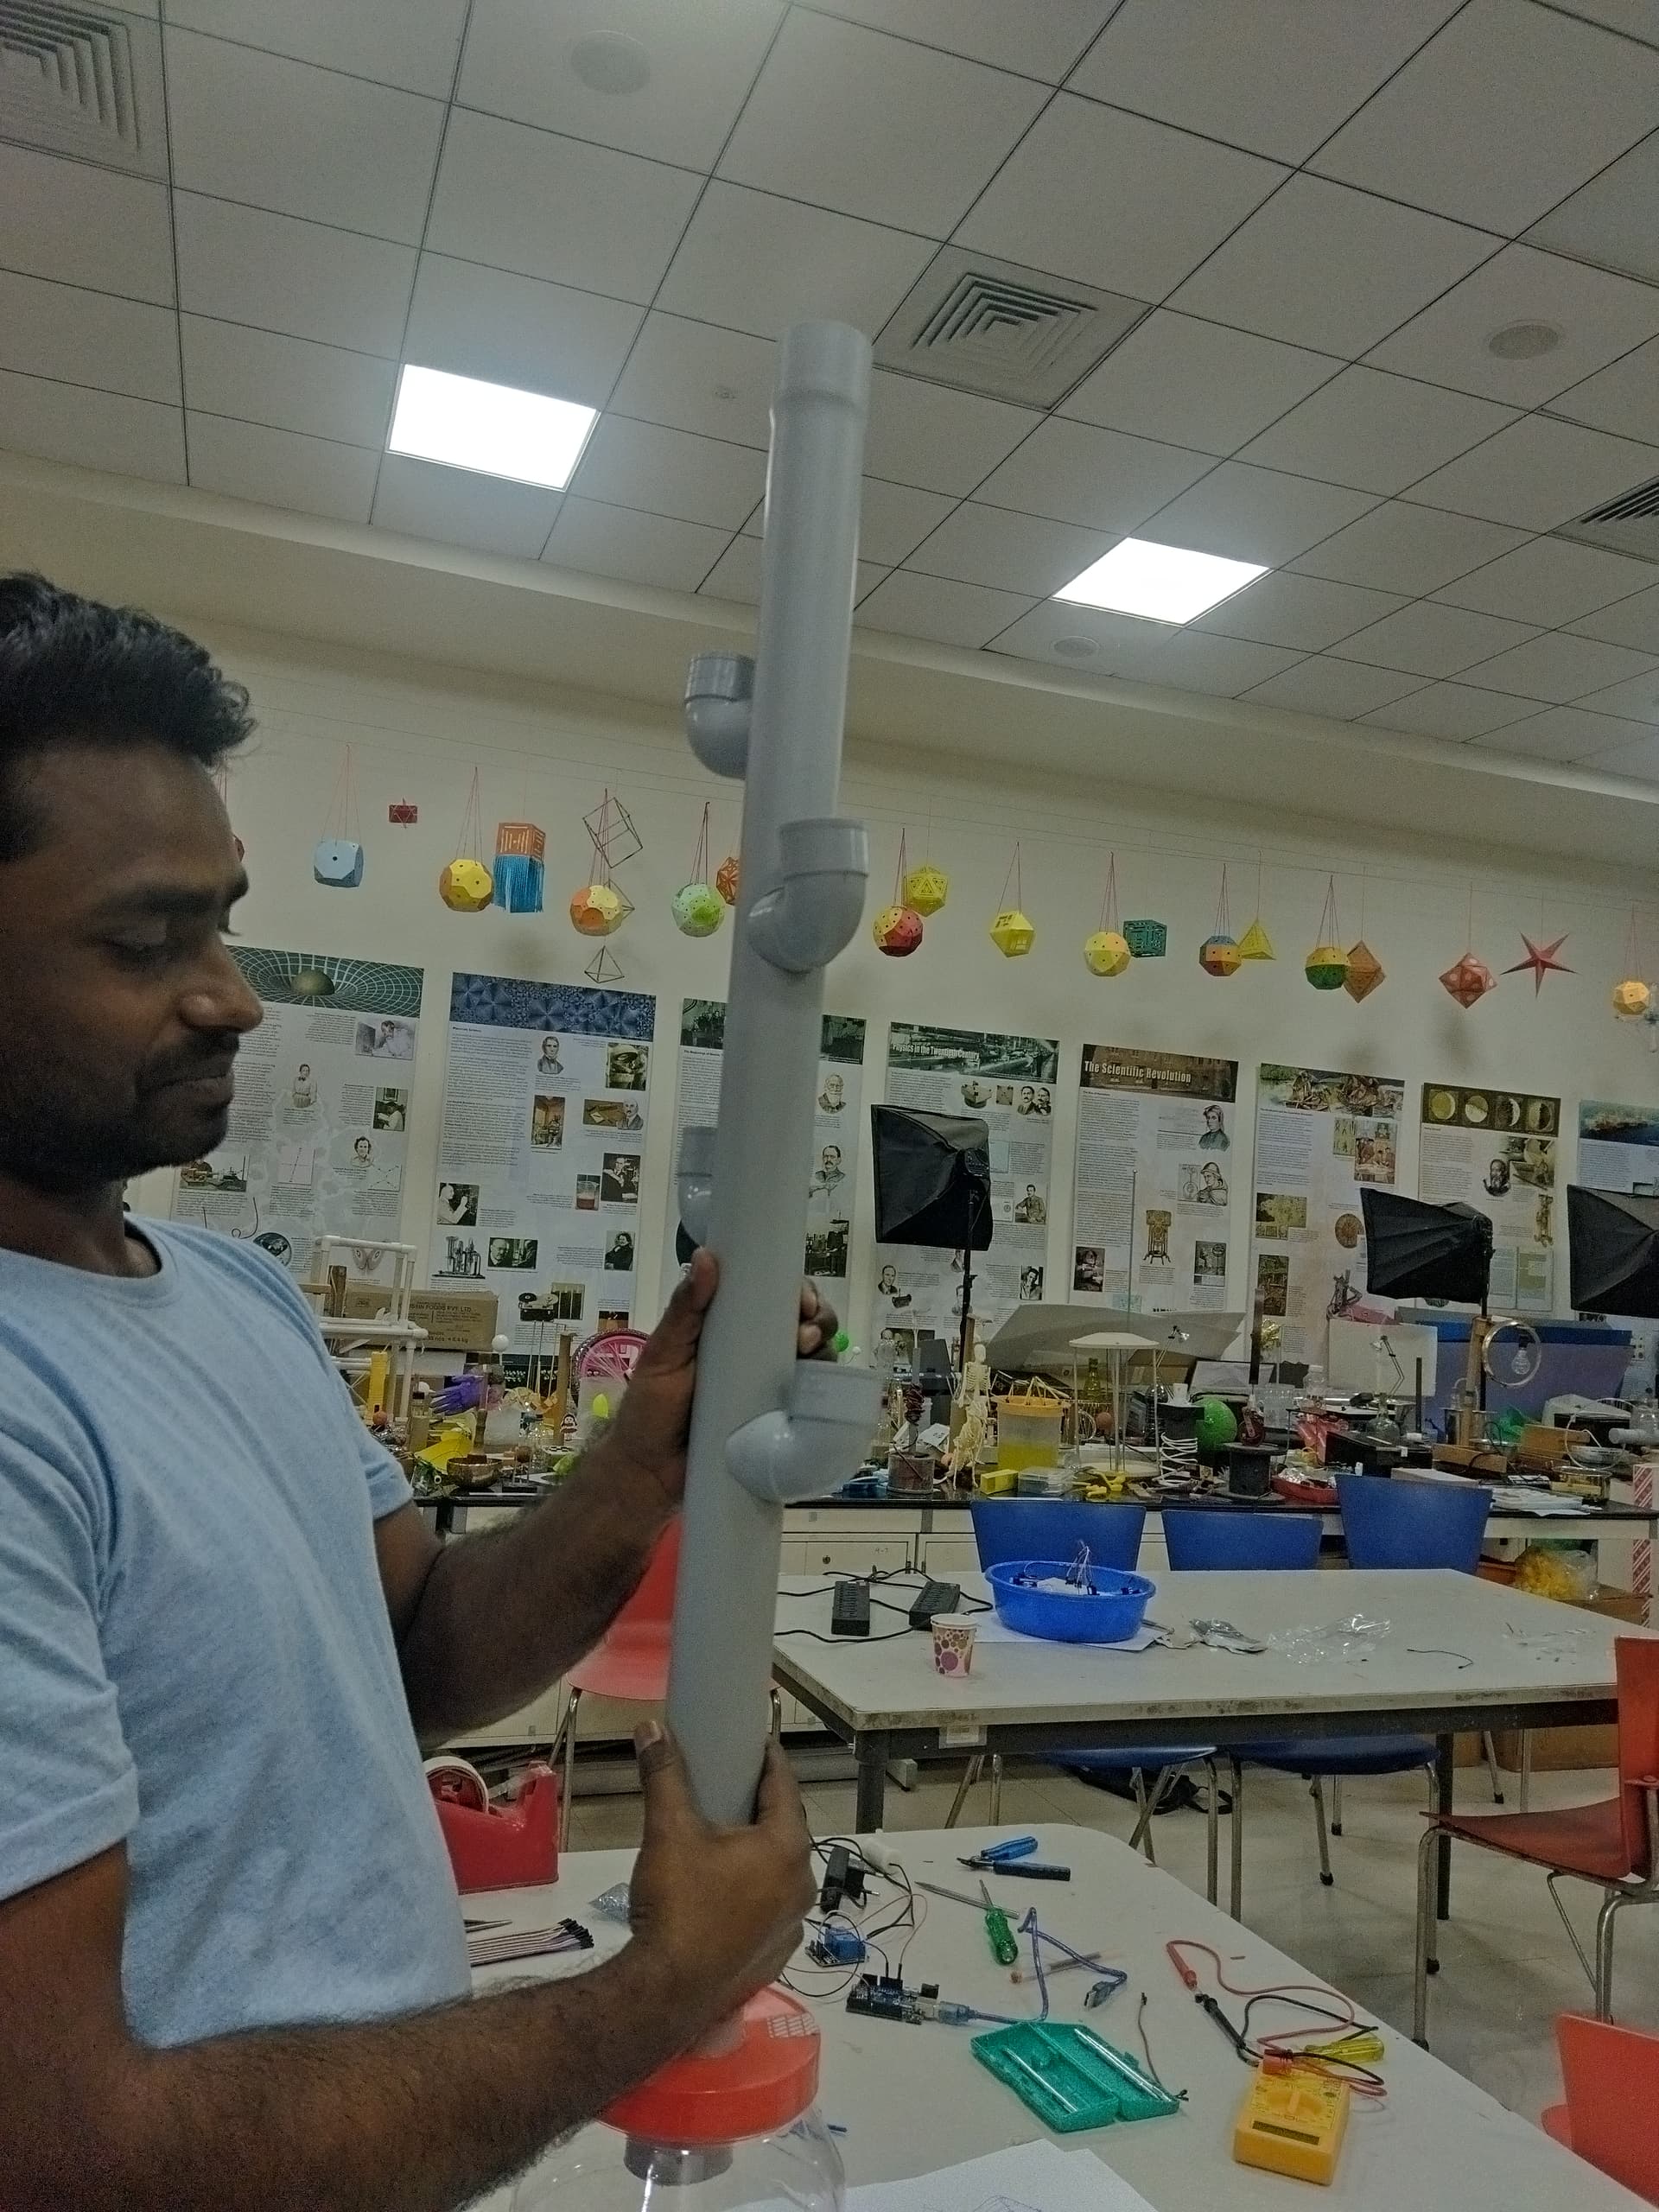
As we understood the drawbacks of first day model, to overcome them we finalised to make vertical hydroponic model. This time we took a larger pipe with a diameter of 11cm.
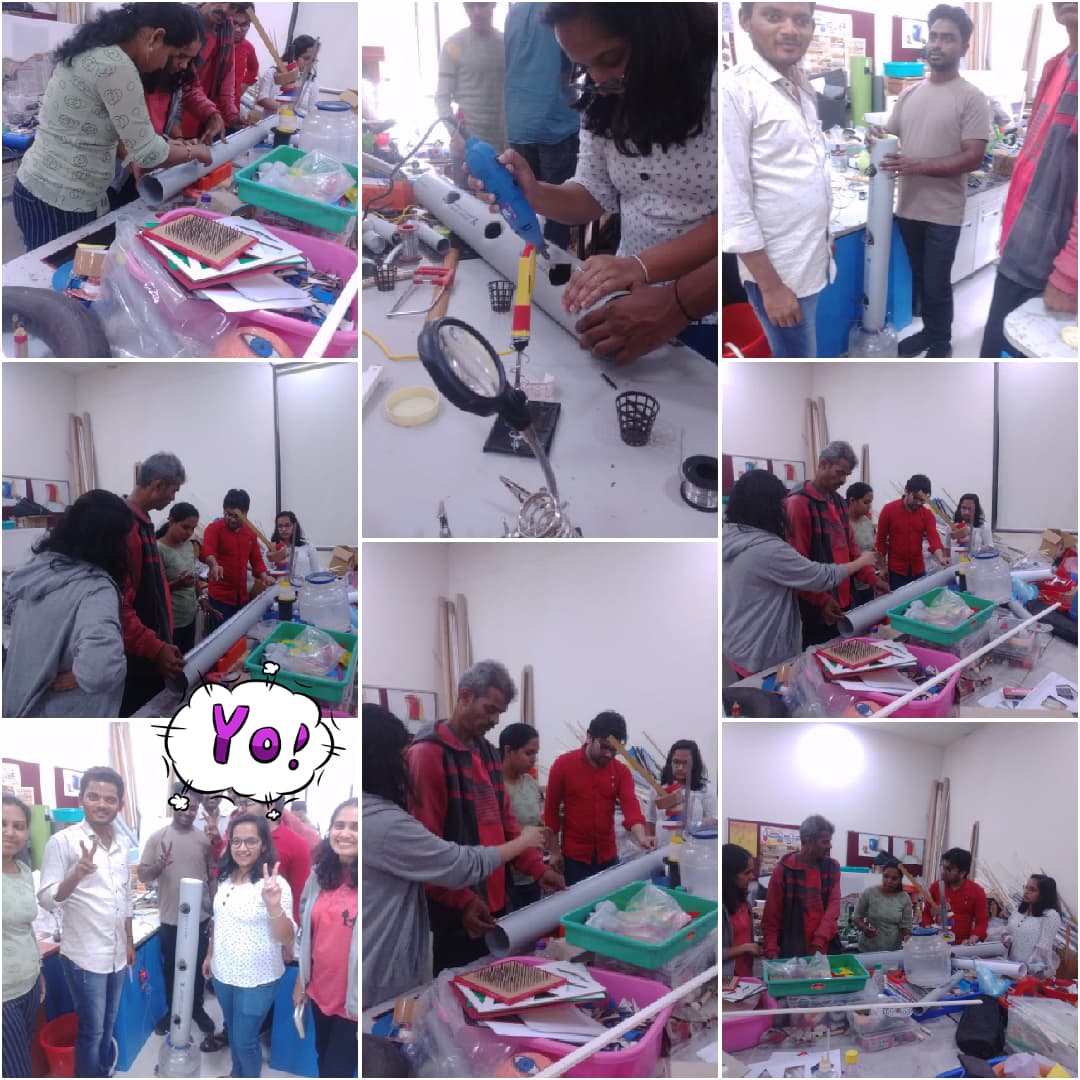
Few modifications were required like enlargement of the holes for net pots with minor changes. This time we made holes using a hot air gun so that we could place the net pots properly. We kept the height of vertical column to be 3.5ft.
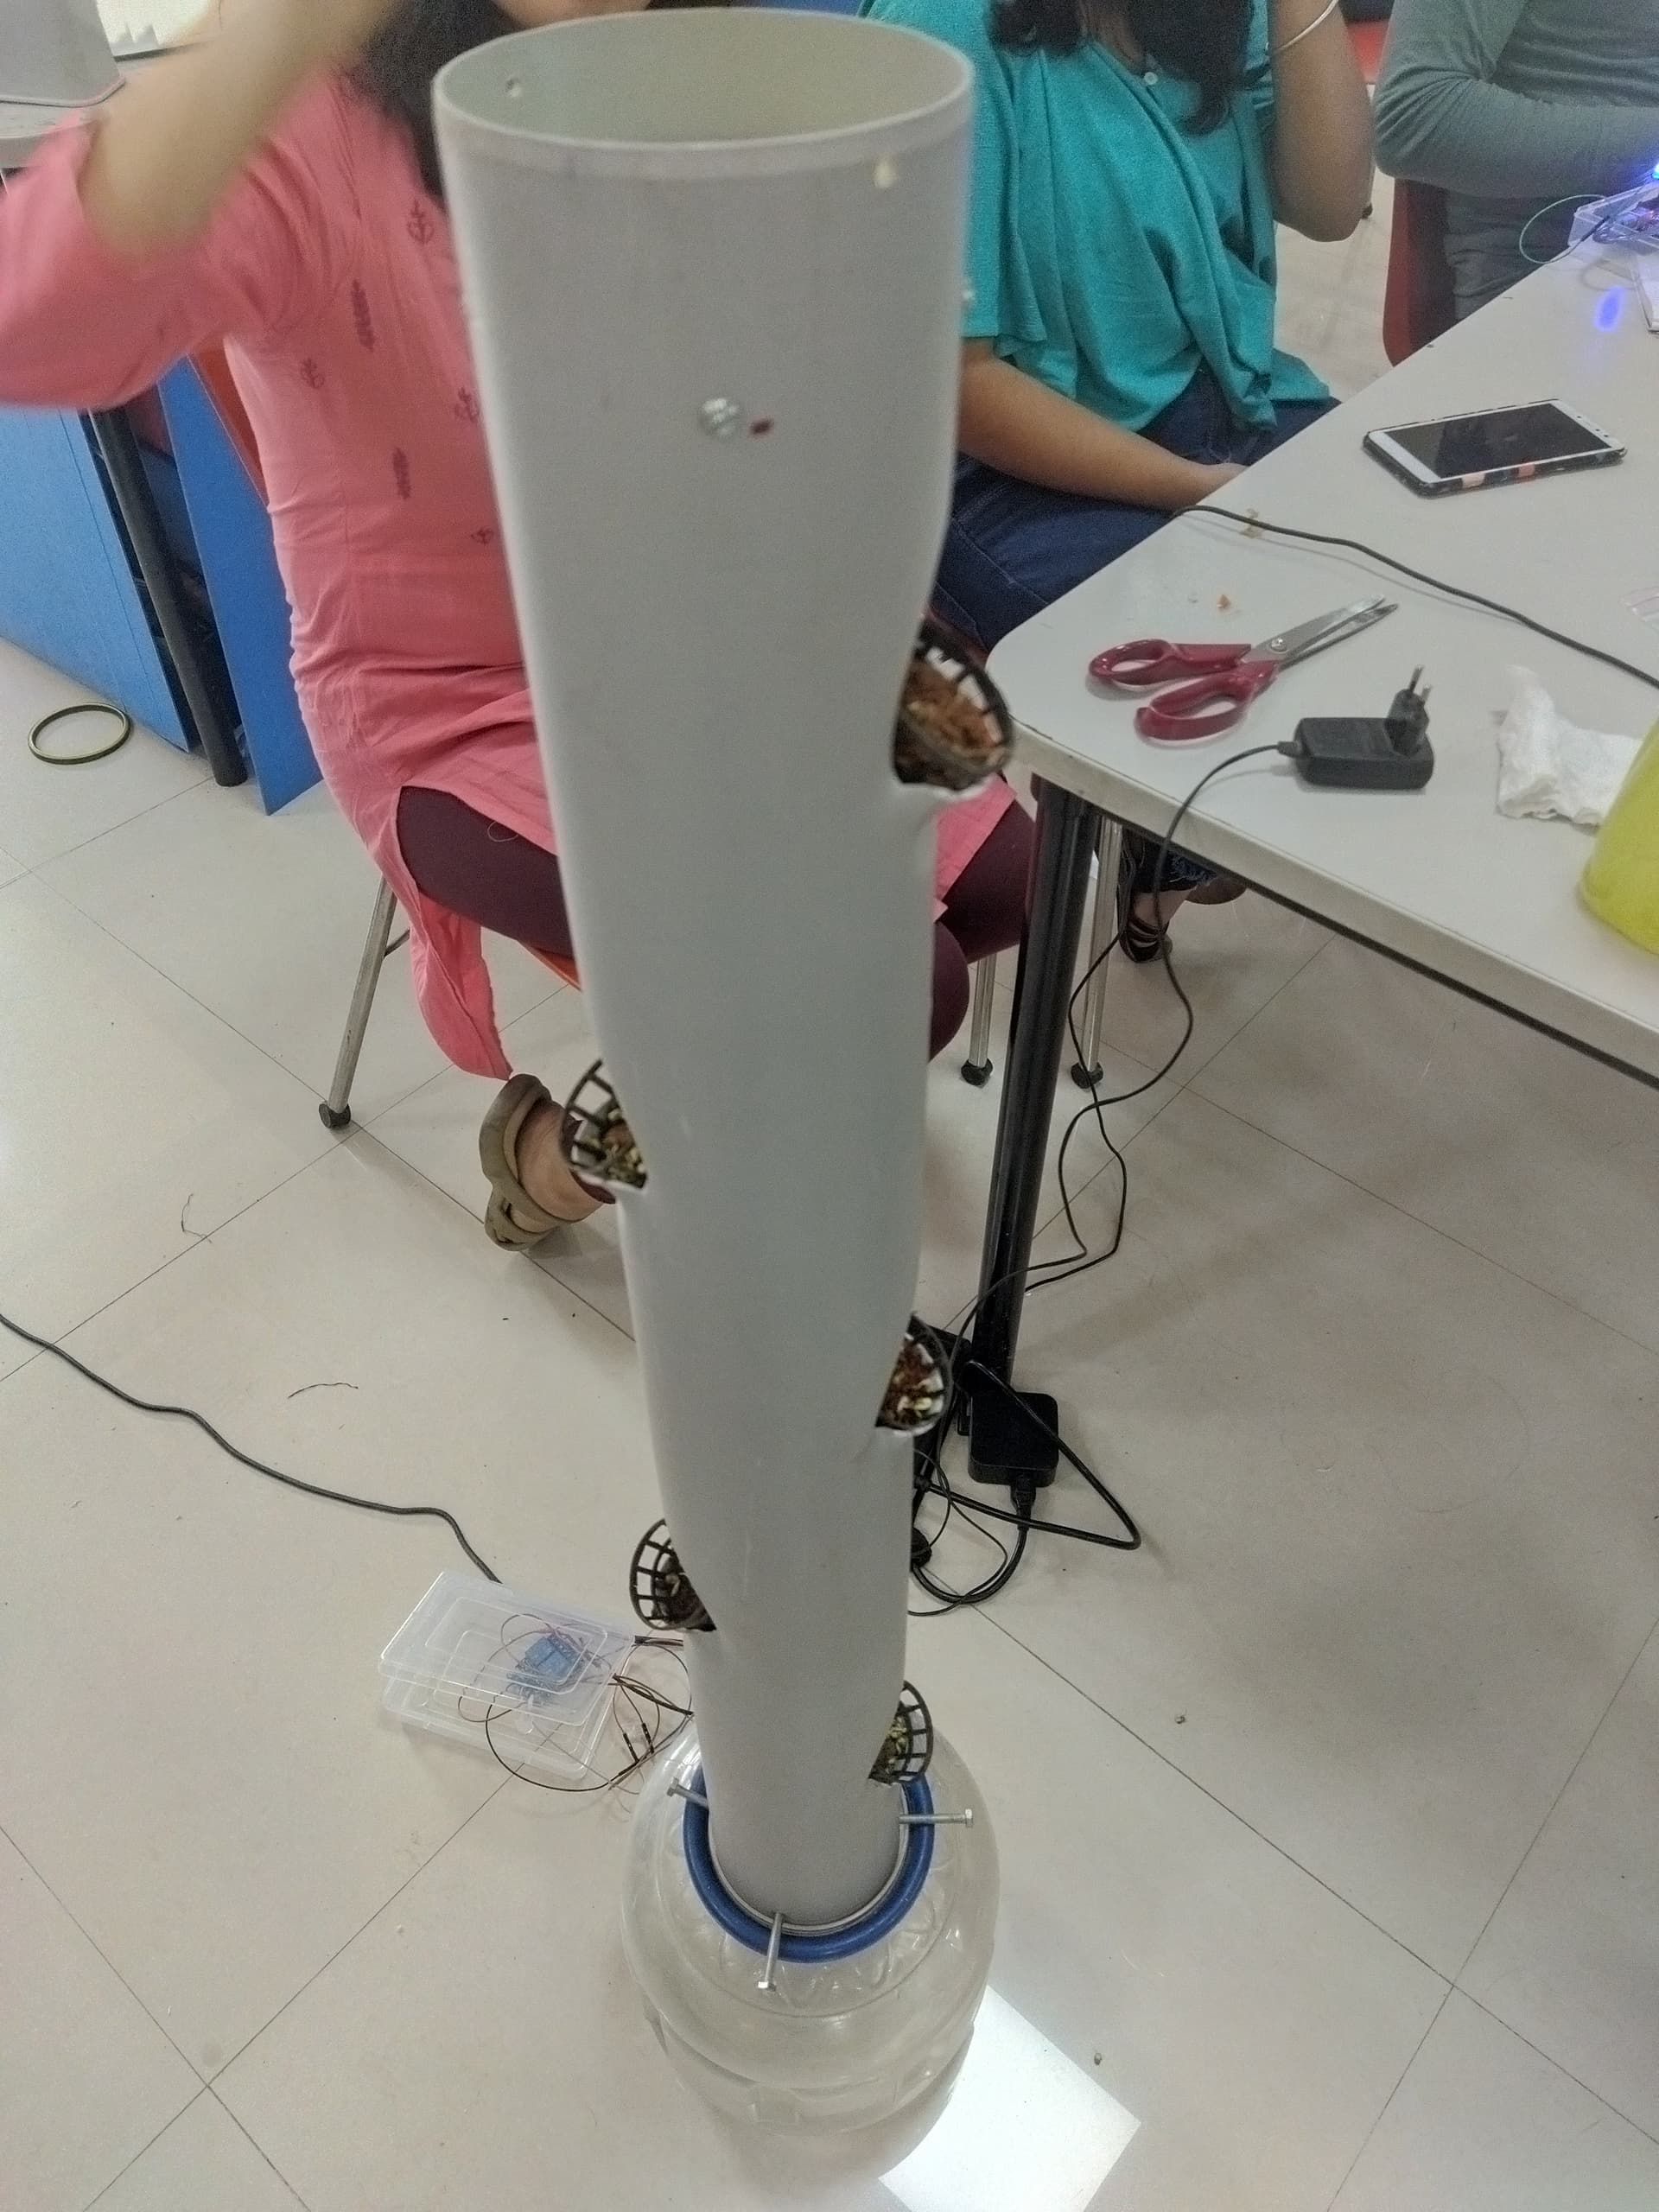
We kept the pipe inside a small tub(here we used a water dispenser). We filled the dispenser with water while the whole water circulation system was automated, with 20s water flow and 30s interval. We tested the assembly several times to find the loopholes. Meanwhile we kept moong, chana for germination.
On third day we finally completed our vertical hydroponic model.
Water circulation automated system was successfully run and checked.
Post lunch we started planning for installing pH sensor and thought of methods to measure the nutrient components of the water.
Let me guess that you drew a helix on the 110 mm diameter PVC pipe, then drilled 40 mm diameter holes 180 degree apart on the helix with the air gun. To simplify the hole view, let us assume that we use a drilling machine with drill bit of 40 mm dia. (Hand drilling machine that I use has wood drilling bit of max 8 mm dia. only!) Looking at the air gunning picture (second on the top pictures) the air gun is held at about 60 degrees with the central axis of the PVC pipe. With 40 mm dia drill bit the hole would be an ellipse (?) and a netpot will fall into the hole at 60 degrees (since the netpot is a cone and not a cylinder like the drill bit in motion, the netpot may not be in at 60 degrees? ) Have you drawn an ellipse on the PVC pipe and air gunned on the ellipse please? Please show us a picture of the hole on the PVC with the camera on the line perpendicular to the PVC axis but pointing to the middle of the hole.
About the helix, havent you run 180 degrees between the holes? As an electrical engineer fascinated by Three Phase AC, I suggest that the holes be driven 130 Degrees (not 120 !) apart.
Hope that someone, who made the hydroponic tower or discussed or thought about it two years back, can answer.
How is the water dispensed to the Net Pots please? By looking at the last picture, the 3.5 m vertical PVC was placed inside a plastic tub or container (2 litres?). A water dispenser will pump the water to the top of the 3.5 m pvc and spray (?) it to the sides of the PVC pipe. Some water will feed the Net Pot and some will flow down to the water tub. Or is the pumped up water dropped through mm pipes onto the Net Pots, not sprayed?