Introduction
GIMP is a free/libre and open-source image manipulation software which can is used to edit and modify images. It is also cross-platform which means it is available for multiple operating systems. In this article, we will look at a very handy feature this application which can help us approximate the dimension of an object using a reference scale. In other words, it allows us to approximate the dimension of the target object relative to an object of known dimension.
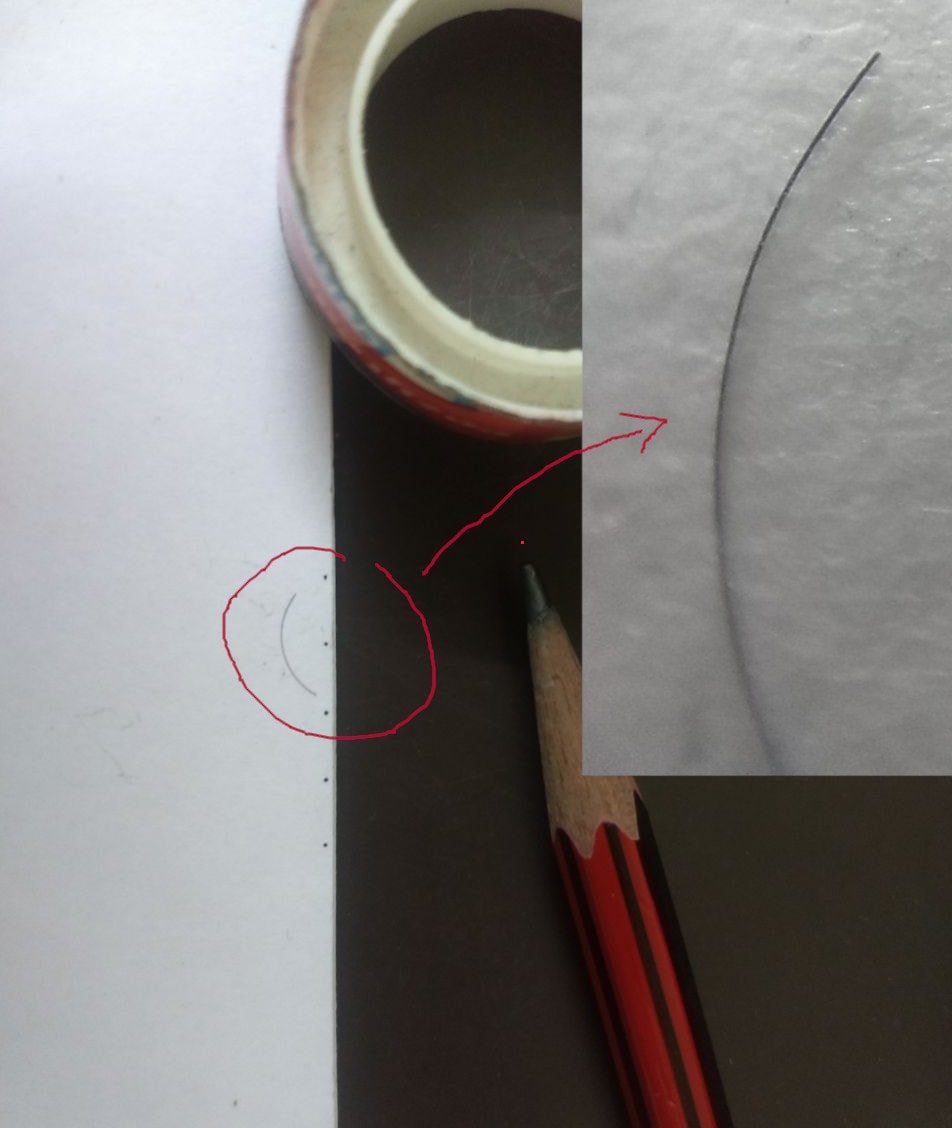
The motivation for this method emerged from activity to convert the phone into a microscope (see here). This allows you to get an optically magnified image of small objects which can further be digitally zoomed in. Here is an example of an optically magnified image of the hair stand captured with the above setup (i.e. lens attached to a smartphone).
Fig 1: Example of a magnified image of hair obtained by attaching a lens in front of the phone camera
Is it possible to approximate the width of hair from the optically magnified image? Indeed, it is and here is the broad outline of the procedure,
-
Place the target object in the same plane as that of known marking/object
-
Capture the image in good lighting conditions
-
Import the image in GIMP and use the “measure” feature to note down the observations.
-
Approximate the length taking care of the errors and unit conversion.
Setup & Capture
For the reference value, I have marked two points which are 5 mm apart. I used a 15 cm ruler to mark the same.
The normal ruler has the least count of mm. That means we can approximate the measurement nearest to millimeters.
The hair strand is kept carefully on the paper such that it’s visible on camera screen along with the two markings. (dots)
It’s better to set the image resolution to a sufficiently larger value such that during the digital magnification, the pixelation is minimized.
The setting of image resolution for this investigation is 1280*960.
Observe, measure, repeat
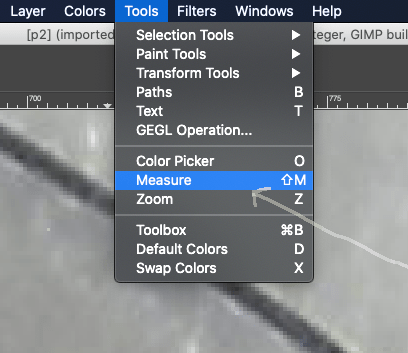
Import(open) the image in GIMP. Select the “Measure” feature by navigating to “Tool >> Measure” option.
Fig 2: Measure feature in GIMP
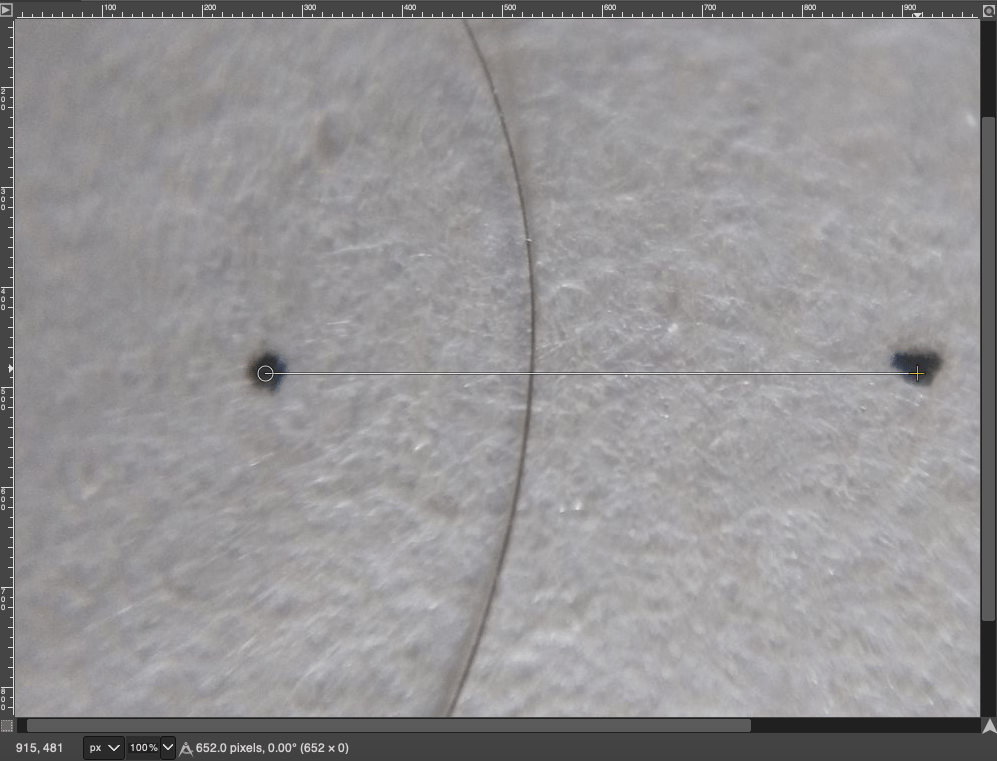
This will activate the measure tool and we are ready to note the observations. To minimize the error, I have taken 5 observations for each - reference scale and the width of a hair. The measurements were done in pixels and later converted to the micron. ( 1/1000th of mm).
Observation 1: Reference Scale
| Reading | Pixels |
|---|---|
| Reading 1 | 652 |
| Reading 2 | 656 |
| Reading 3 | 655 |
| Reading 4 | 653 |
| Reading 5 | 654 |
| Average | 654 |
Fig 3: Screenshot of one of the readings of reference scale. The reading is visible in the bottom as 652 pixels.
Observation 2: Hair Width
| Reading | Pixels |
|---|---|
| Reading 1 | 4 |
| Reading 2 | 5 |
| Reading 3 | 4 |
| Reading 4 | 4 |
| Reading 5 | 4 |
| Average | 4.2 ~ 4 |
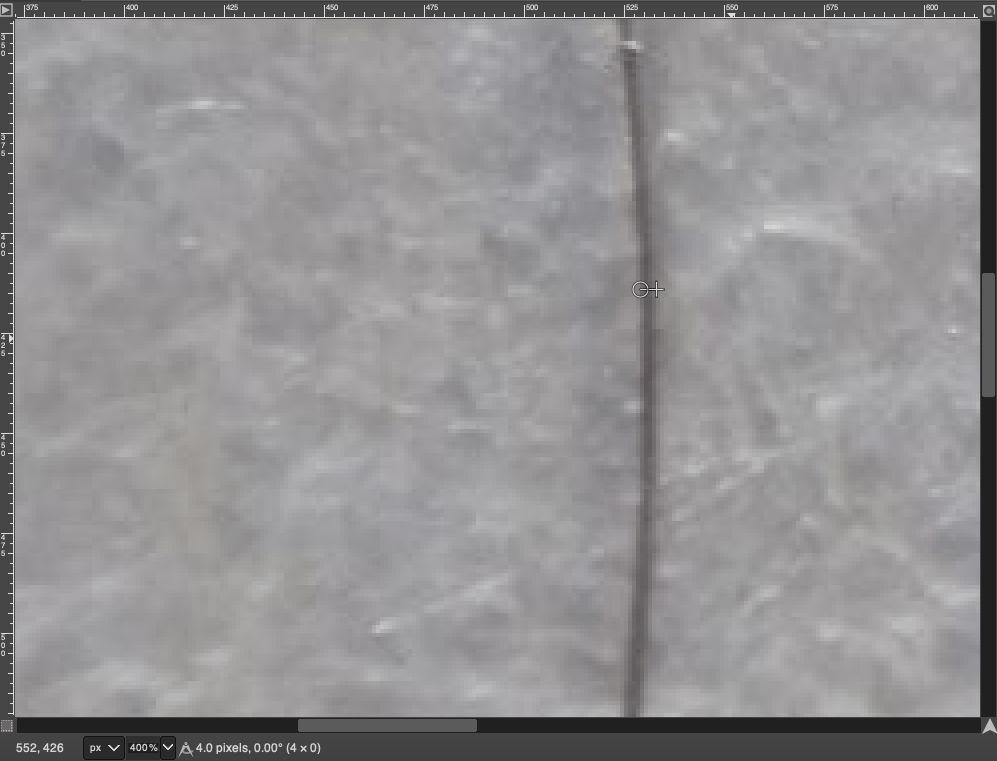
Fig 4: Screenshot of one of the readings of a hair width. The reading is visible in the bottom as 4 pixels. The image is also magnified 4x times to have better clarity and lock the starting and endpoints.
Calculate
We know that the distance between the two dots is around 5 mm.
Also, from the observation,
-
The average distance between the two dots in pixels is around 654 pixels
-
The average width of the hair is around 4 pixels.
It’s important to note the word “around” as all these values are approximated not NOT exact.
The simple ratio would give us the value for the width of the hair in mm,
{\frac{5\ mm}{654 \ pixels}}={\frac{x}{4\ pixels}}
{x}= {\frac{5\ mm}{654 \ pixels}}*{\frac{4 \ pixels}{1}}
{x}= {\frac{5\ mm}{654 \ pixels}}*{\frac{4 \ pixels}{1}}
x = 0.031 mm
x = 31 \mu m (as 1 mm = 1000 \mu m )
Hence, the average width of the hair is around 31 \mu m
Error approximation
Even with a careful recording of observation, there will be variation in individual reading due to many unavoidable factors. These are known as random errors. Hence, even the average value we obtained is uncertain. One of the simplest way to determine the uncertainty on average with fewer observations is to calculate the range. The range is the difference between the highest and lowest value in a set of observations. Taking the half of that gives a rough estimation of uncertainty in the mean. In this section, we will re-share the values incorporating errors for both the observations.
For reference scale, (in pixels)
Average value = 654
Highest value = 656
Lowest value = 652
Range = 656 - 652 = 4
Error = Range/2 = 4/2 = 2
The average can be represented as 654 \pm 2 pixels.
% Error = {\frac{2}{654}}*100 = ~ 0.31%
For hair width, (in pixels)
Average value = 4
Highest value = 5
Lowest value = 4
Range = 5 - 4 = 1
Error = Range/2 = 1/2 = 0.5
The average can be represented as 4 \pm 0.5 pixels.
% Error = {\frac{0.5}{4}}*100 = 12.5%
For hair width (in micron)
As we have seen earlier,
{x}= {\frac{5\ mm}{654 \ pixels}}*{\frac{4 \ pixels}{1}} = 0.031 mm
where ‘x’ is the width of in mm.
When two errors are combined by multiplication or division, relative errors generally add in quadrature. i.e. we square both the uncertainties, add those and then take the square root of the value.
To calculate error in x,
relative \ error \ in \ x = \sqrt {\left( { \frac{2}{654}} \right)^2 + \left( {\frac{0.5}{4} } \right)^2 }
Ignoring the first term of the expression as it is considerably small,
relative \ error \ in \ x = {\frac{0.5}{4}}
error \ in \ x = {\frac{0.5}{4}}* 0.031 \ mm
error \ in \ x = 0.004 \ mm
error \ in \ x = 4 \mu m
Hence, we can represent the average width of hair in micron as 31 \pm \ 4\ \mu m
Questions to ponder
-
How would the calculations change when you use a reference scale with a different value?
-
How would the calculation change if the image will be of different resolution?
-
What are the factors on which the random error will depend upon? What strategies can be taken to minimize those?
-
What are the other sources of error which can emerge during the investigation?
I hope this exercise would be an interesting starting point to dive deeper into the \mu World .