Can I know more about the prerequisites and equipments required to take up this project?
1 Like
Hi @Abhishek_Kumar you can start with your laptop (recommended OS Ubuntu) with a working webcam. Install opencv and start with writing python program .
May I know the application you are thinking using Opencv.
At later stage this application might transfer to raspberry pi setup connected either with raspberry pi camera or USB Webcam
If you currently have raspberry pi setup and any of the above camera, you can start straight away with this setup.
2 Likes
Sir, can you explain what you mean by “application”?
Do we have to make an app for the project or are you talking about the applications of OpenCV?
Also, I wanted to know if it is possible for me to start learning OpenCV from scratch since I have no previous experience with this. I do have basic programming knowledge of c++ and python.
As for the webcam and Raspberry Pi setup, I’m sorry to inform you that I don’t have either of them currently.
2 Likes
@Abhishek_Kumar, it is not at all mandatory to have raspberry pi setup, you can directly start with your own laptop and builtin working camera.
By application I mean which project/challenge you are thinking to design and develop using OpenCV.
Yes you can start your journey for learning OpenCV from scratch, here are some links which will help you.
https://docs.opencv.org/master/d6/d00/tutorial_py_root.html
Please let us know if you have any query.
Happy Exploring!
2 Likes
@Ashish_Pardeshi Thanks a lot for the links that you provided!
The application I thought was the same as mentioned in the orientation programme i.e. Creating 3D drawing files by taking input from a series of images.
2 Likes
That too is a project. Refer to the website below. The site pulls 100s of images from published papers with references. Now imagine viewing these with google Cardboard.
https://ocellus.info/images.html?q="10.11646/zootaxa.4773.1.1"&size=100&page=1&communities=biosyslit
Apart from converting regular images into 3d or line drawings, I see an urgent need to create a platform for taking images off a microscope from multiple angles, then stitching them to make a 3d image viewable with Cardboard.
4 Likes
Some links shared by Jude in today’s meeting
GitHub - cdcseacave/openMVS: open Multi-View Stereo reconstruction library](GitHub - cdcseacave/openMVS: open Multi-View Stereo reconstruction library
GitHub - openMVG/openMVG: open Multiple View Geometry library. Basis for 3D computer vision and Structure from Motion. Agisoft Metashape: Installer Blender
Blender Tutorial - 2D To 3D In Blender - Quick Tutorial - YouTube 3D Photography Workflow | Using Metashape + Blender - YouTube
GitHub - alicevision/Meshroom: 3D Reconstruction Software http://alicevision.github.io/
1 Like
This is with reference to our decision to use OpenSCAD for designing the stage once the software work is done.
This was decided based on the following features of OpenSCAD:
-
Variables are modifiable. OpenSCAD reads the design script and compiles the object from there instead of direct interaction with the object design, thus making it very easy to change the parameters and other variables any time we want.
-
Algorithms enable complicated designs. This level of detail control gives us the precision needed for designs and models (especially for sensitive designs as in our case) that have many more points of reference than those created visually.
-
User-made designs are easily accessible. Being an open-source software, OpenSCAD has all its own program code available for use and manipulation. So if we don’t find a feature that we wanted to use, we can go to the OpenSCAD community and check if someone else has already built it.
We decided NOT to go with FreeCAD because of the following drawbacks :
-
The learning curve is steep. It takes time to learn how to navigate. Even with the community’s wealth of advice and tutorials, it can be overwhelming.
-
The CAD kernel is buggy. Open Cascade apparently has a few bugs within it that FreeCAD’s troubleshooters can’t fix, and that’s a major issue if we come across one during a major design.
-
Complex designs slow performance. Users who have pushed FreeCAD to its design limits have noticed a bit of a lag once an object reaches a certain level of complexity. This is apparently because it runs single-threaded, which means it executes just one command at a time.
2 Likes
We have decided to work on the software side of things currently. The libraries we are using for converting images to 3-D point clouds and meshes, openMVG and openMVS respectively, have been tested on image datasets provided along with them. We’ll test them on photos taken by us, and work our way downwards to organisms like ants as suggested by G_N, and identify the possible issues we might then face on micro-organisms. We’ll then take into account these issues while designing the stand.
2 Likes
Can you post some links about the points you have mentioned?
Pros and cons of both FreeCAD and OpenSCAD have been given in the above mentioned link.
We decided to go with OpenSCAD based on these points and how they affect our objective.
2 Likes
We are learning to use OpenMVG library to generate Sparse Point Cloud for 3D reconstruction.
Update :
We’ve installed Ubuntu on a virtual machine and have been trying to build the library.
We’ll be following the build instructions as mentioned in the following link
For OpenMVG
This produces a Sparse Point Cloud from the given image data-set of pinhole images.
Expecting to finish building the files by today.
2 Likes
This link contains various ways of implementing photogrammetry.
It also compares and contrasts the results from the same set of input images.
As of now, we’ve built and ran the test input data from OpenMVG and OpenMVS and are trying to figure out how to extend them to regular images shot through phone.
We might also try to extract frames straight from a video once we are able to work on phone images.
When this is done, we’ll try a few techniques mentioned in the above link on the same test data and compare the results.
2 Likes
Update:
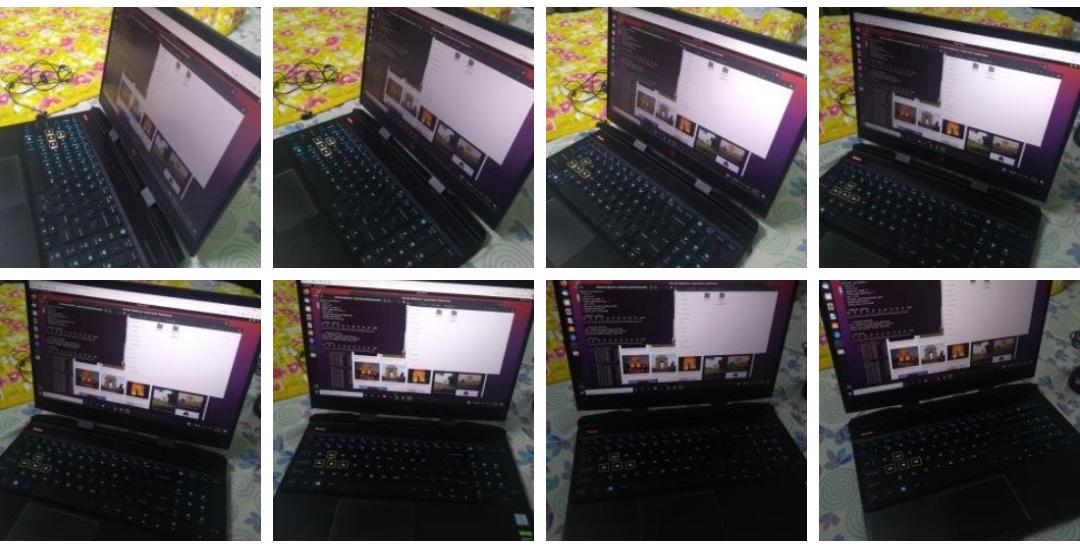
After successfully running the algorithm on the input dataset provided with the library, we tried to run the algorithm on images shot through a smartphone.
Here’s the input data set (containing 8 pictures of my laptop):
Here’s the resulting .ply file (viewed in Meshlab):
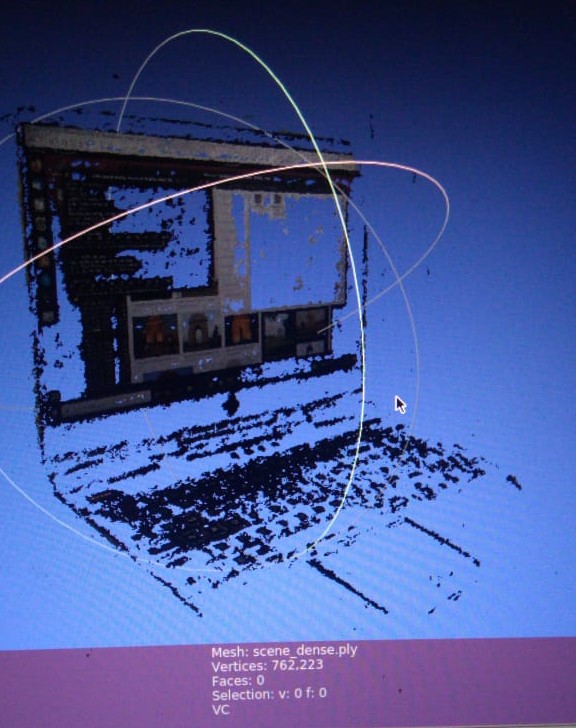
As we can notice, the reconstruction is not very solid and appears to be glitchy. This is the Dense Point Cloud generated using OpenMVS which only consists of vertices and no faces.
The next step is to reconstruct it as a mesh and add textures to it (as per the input images).
This will reduce the unwanted gaps in the model and give us a solid model.
We tried to run the algorithm on a few more image datasets but this gave us the best results so far. For others, OpenMVG failed to generate a Sparse Point Cloud with enough vertices to enable densification. Comparing the results on the different input datasets, we found that we need to impose the following conditions on the input dataset for a clean reconstruction:
-
High Resolution : More the pixels, more the number of features matched and better the Point Cloud generated. Thus, the images need to be of high resolution.
-
Subject should occupy at least 80% of the image : This is so that the unnecessary background information is not reconstructed as it leads to increased computation time.
-
Calibrated images : The images in the input should be given a specific order i.e. with the camera moving/rotating only in one direction. Also, the difference between two consecutive images should be minimal so that feature detection produces good results.
-
Lighting and Shiny Surfaces : The lighting in the scene should be uniform and bright. Shiny surfaces should also be avoided as they lead to unwanted textures in the model.
Once we are done with mesh reconstruction and texturing (with OpenMVS), we will also be looking for alternative Sparse Point Cloud generation techniques such as COLMAP and VisualSFM.
4 Likes
Very nice start.
1 Like
Update after Mesh Reconstruction and Texturing:
This is the mesh generated from the same image data set (of my Laptop):

This is the same mesh with Texture Info (stored as a raster png file):
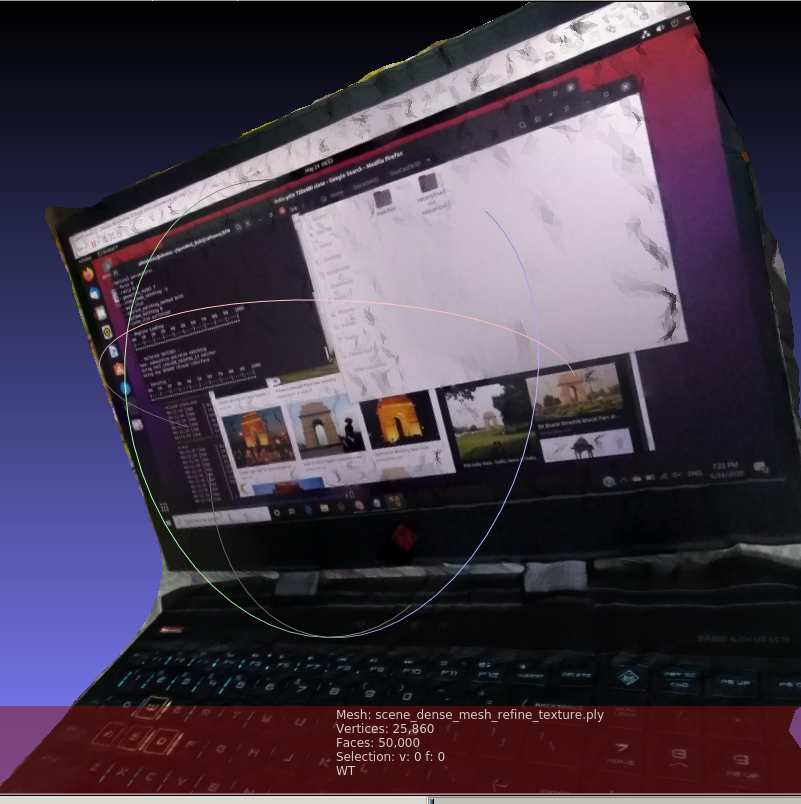
We decimated the mesh and decreased the number of faces from 666214 to 50000 to reduce the computation time needed for texturing.
There is some amount of post processing that needs to be done to remove the unwanted mesh areas and produce a clean result. This can easily be done using Meshlab or CloudCompare.
2 Likes
Update:
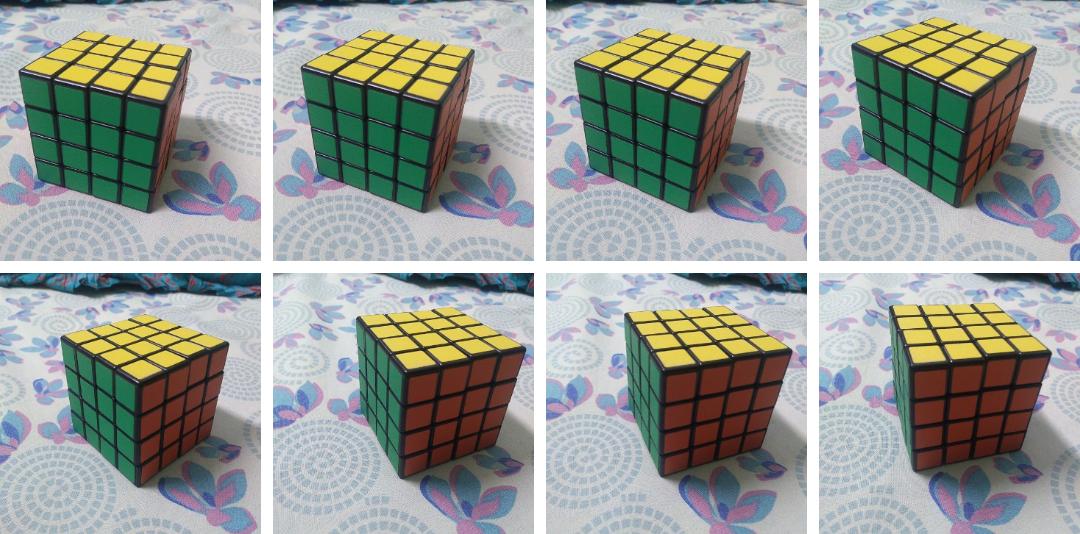
Reconstruction of a 4x4x4 Rubik’s Cube
The input data set consisted of 18 images of the cube (spanning across 270 degrees), 1.4 Mega Pixels each
Here are few of the input images:
Here is the output reconstruction (after post processing):
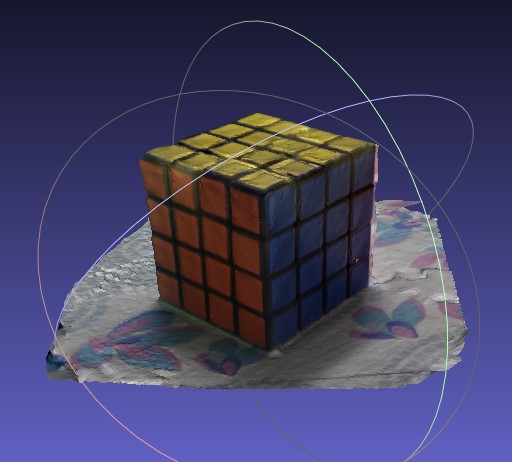
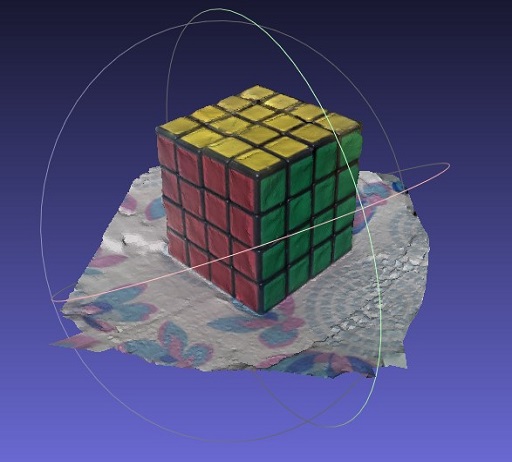
Insights
- The input images need not necessarily be of high resolution (as we previously thought). Even low resolutions like 1.4 Mp (as in this case) give satisfactory results when high clarity is not a requirement. The computation time is also reduced by a large amount in case of low res images.
- Also, it makes a huge difference if there is a textured background rather than a plane white sheet as it helps in calculating the depth map bettter.
5 Likes
This is so cool. Great Going!
2 Likes
This video looks at how insect photogrammetry can be extremely useful for scientists all around the world. They can make all sorts of observations using the 3D model without actually interacting with the insect. This is done by reconstructing big digital models of some very small insects at the Australian National Insect Collection.

4 Likes
@Abhishek_Kumar Thanks for sharing this, it is so inspirational.
The setup shown in the above video is awesome, The turn Table and the computer controlled High resolution camera.
I think making of such platform for photogrammetry is highly needed, just put the specimen there and let this automatic control system work to generate datasets of hundreds of images from various different angles.
How about making such setups, basically a turntable with the help using PAN and TILT mechanism and setting up a high quality Raspberry Pi Camera on the rail, the complete system can be powered using Raspberry PI computer.
In case of the insect, such kind of platforms are can be build with such references, but if we consider the micro organisms then the challenge is completely at different level, but again achievable.
Looking forward for discussion on hardware setup for microorganism photgrammetry.
2 Likes