Hi
This section is a little longer since it covers both the introduction as well as the design challenge part. After a brief introduction to OpenSCAD, you will directly jump into the design challenge. It would be great if you can come up with your own design of the pen-stand and share it below. Also, write about your experience of learning OpenSCAD. How was it? Did you find it difficult or was it easy? What are the features you liked and which part can be improved? Looking forward to your reflections!
Installation
This page contains detailed instruction to install for various OS - Installation Guide
The summary for commonly used OS is here -
For linux
$ sudo apt-get install openscad
For Windows
Check your system architecture and Download the respective exe file
For mac
There are two options : 1. Directly install by downloading the .dmg package 2. If you have macPorts installed, you can write
$ sudo port install openscad
First steps
Have a look at the “First steps” in wikibook to understand how to get started. There are
- Creating a simple model
- Positioning an object
- Changing the color of an object
- Opening an existing example model
Source: OpenSCAD User Manual/First Steps - Wikibooks, open books for an open world
Now, let’s get started to unpack the “following” code!
Part 1 Design a simple stand
Output
Here is the simple stand. Try to modify the value and see how the shape changes. Get yourself familiar to the cube(), cylinder(), translate(), rotate(), difference().
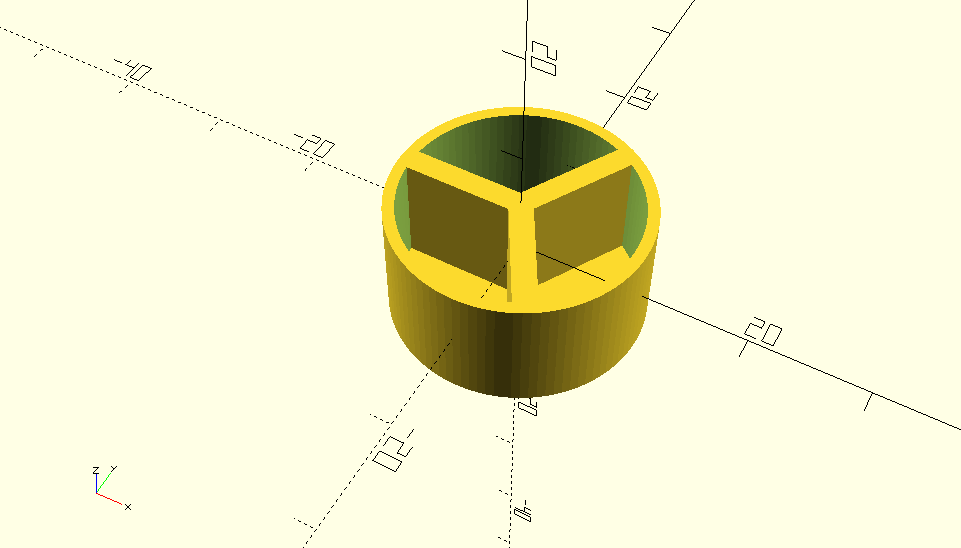
Code
$fn=100;

//base of the stand
translate([0,0,-6])cylinder(r=11,h=1);

//outer boundary of the stand
difference(){
    cylinder(r=11,h=10,center=true);
    cylinder(r=10,h=10,center=true);
}
//inner compartments
translate([-5,0,0])color("red")cube([10,2,10],center=true);
rotate([0,0,120])translate([-5,0,0])color("blue")cube([10,2,10],center=true);
rotate([0,0,120*2])translate([-5,0,0])color("green")cube([10,2,10],center=true);
Process Documentation
If you are having difficulty in understanding the above, the pocess documentation of the above code is here
 OpenSCAD Part 1: Introduction - Explore while designing a pen-stand")
Part 2 How to parametrize a model?
This part is little more elegant way of doing the same. Here you will explore module(){} feature and parameterization technique which makes OpenSCAD really flexible!
Output
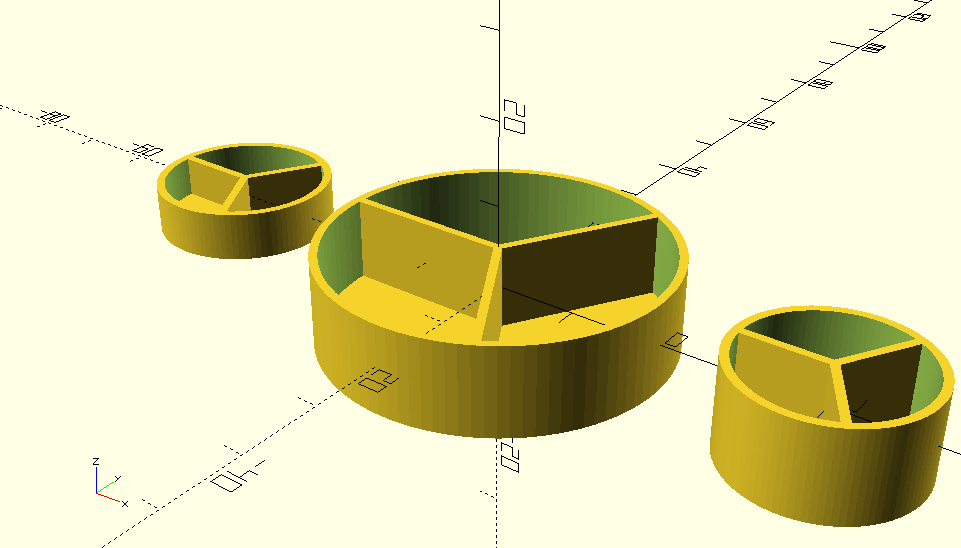
Code
module stand(stand_r,stand_h){
    //base of the stand
    translate([0,0,-(stand_h/2)-1])cylinder(r=stand_r+1,h=1);

    //outer boundary of the stand
    difference(){
        cylinder(r=stand_r+1,h=stand_h,center=true);
        cylinder(r=stand_r,h=stand_h,center=true);
    }
    //inner compartments
    translate([-(stand_r/2),0,0])color("red")cube([stand_r,1,stand_h],center=true);
    rotate([0,0,120])translate([-(stand_r/2),0,0])color("blue")cube([stand_r,1,stand_h],center=true);
    rotate([0,0,120*2])translate([-(stand_r/2),0,0])color("green")cube([stand_r,1,stand_h],center=true);

}

stand(20,10); // stand(radius,height) stand(10,10) or stand(10,5) or stand(20,10)
translate([40,0,0])stand(10,10);
translate([-40,0,0])stand(10,5);
Process Documentation
 OpenSCAD Part 2 - How to parameterize the object using module functionality?")
Challenge
Can you write the script to ask the user how many compartments are needed? Based on the input say (2,3,4,5,6) the design of the model should change.
Also, now that you are familiar with the basics of OpenSCAD, it will be awesome if you can design your own pen-stand and share that as challenge with us too!