Techniques Of Culturing Earthworms
Ritik Baviskar
CUBE Lab
Elphinstone College
Abstract
In terms of research with model organisms, culturing is one of the mandatory procedures every researcher should know about. Depending upon the features like where your model organism is found in nature, what it feeds on, and what conditions are necessary for it to be alive should be observed. This is an article that will brief you about different techniques which are used to culture earthworms in the lab with the help of easily accessible materials.
This will benefit researchers to continue their work in a less tedious and cost-effective manner.
Ritik Baviskar, CC BY-SA 4.0, via Wikimedia Commons
Keywords : Earthworm, cup culture, worm pit.
How do we culture earthworms?
Normally where do you think earthworms are found? Think about it.
Earthworms are normally found in moist soil and in shady places where there is not much sunlight (eg: Below plant pots or under trees) and they feed on the soil around them hence keeping these features into consideration there are mainly 2 types of culturing methods used by us.
- Cup-Culture method
- Worm Pit Method.
Let us see what these two methods are in brief.
Cup-Culture :
The cup culture method is one of the very easy techniques of culturing earthworms which is performed with the help of very cheap and easily available materials
Material needed:-
- A plastic cup
- Tissue paper
- Needle
- Muslin cloth
- Rubberband.
- Plastic tray
- Filter paper
- Brush
- Earthworms
Method :-
- Take a plastic cup and make holes under it with the help of the needle
- Then make bits of tissue paper and add it into the cup until the cup is filled fully with the bits of tissue paper
- Then add tap water into the cup until the paper is partially moist, as you add water the tissue paper will settle down.
- Follow step 2 and 3 until the cup is half-filled with moist tissue paper.
- Now add 4-5 earthworms in this half-filled cup with the help of a brush.
- fill the cup completely with moist tissue if you want to put 10-12 earthworms in one cup.
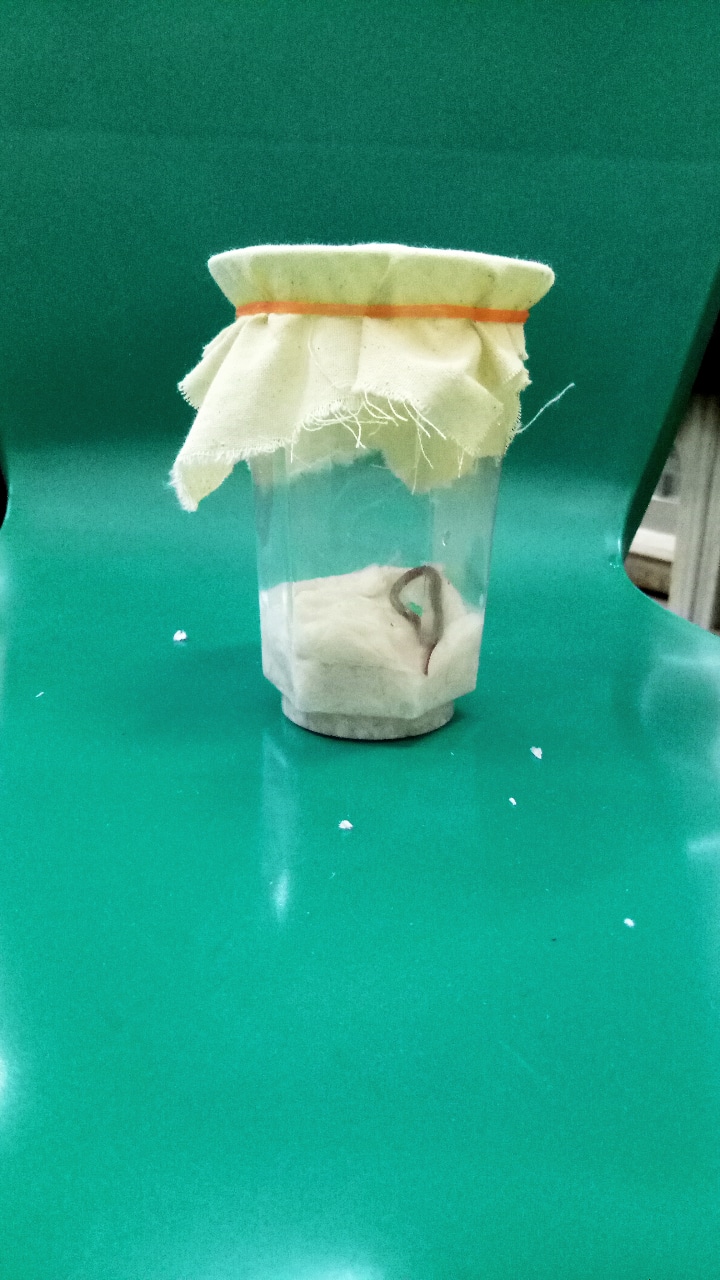
- Cover the plastic cup with a piece of muslin cloth and a rubber band.
- Take a plastic tray and add 3-4 layers of the filter in it, add water to the filter paper until it gets completely wet.
- Place your tissue cup cultures of earthworms in this tray.
- Add 100-150ml water to the tray daily so that the tissue in the cup remains moist, as we’ve made holes under the cup the water will enter the cups and keep the tissues inside the cup moist.
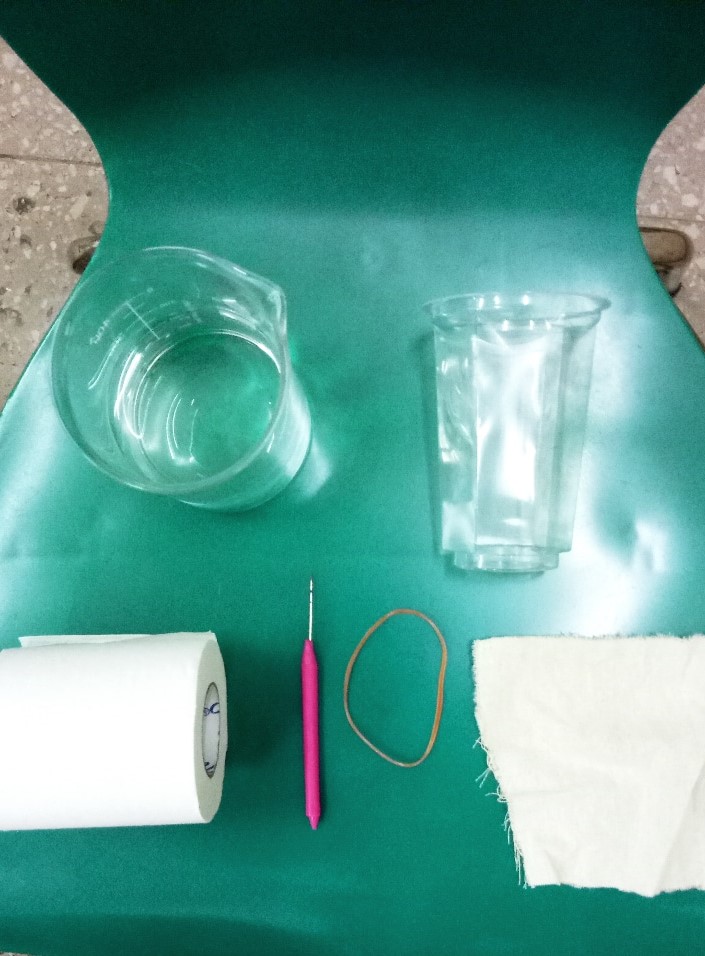
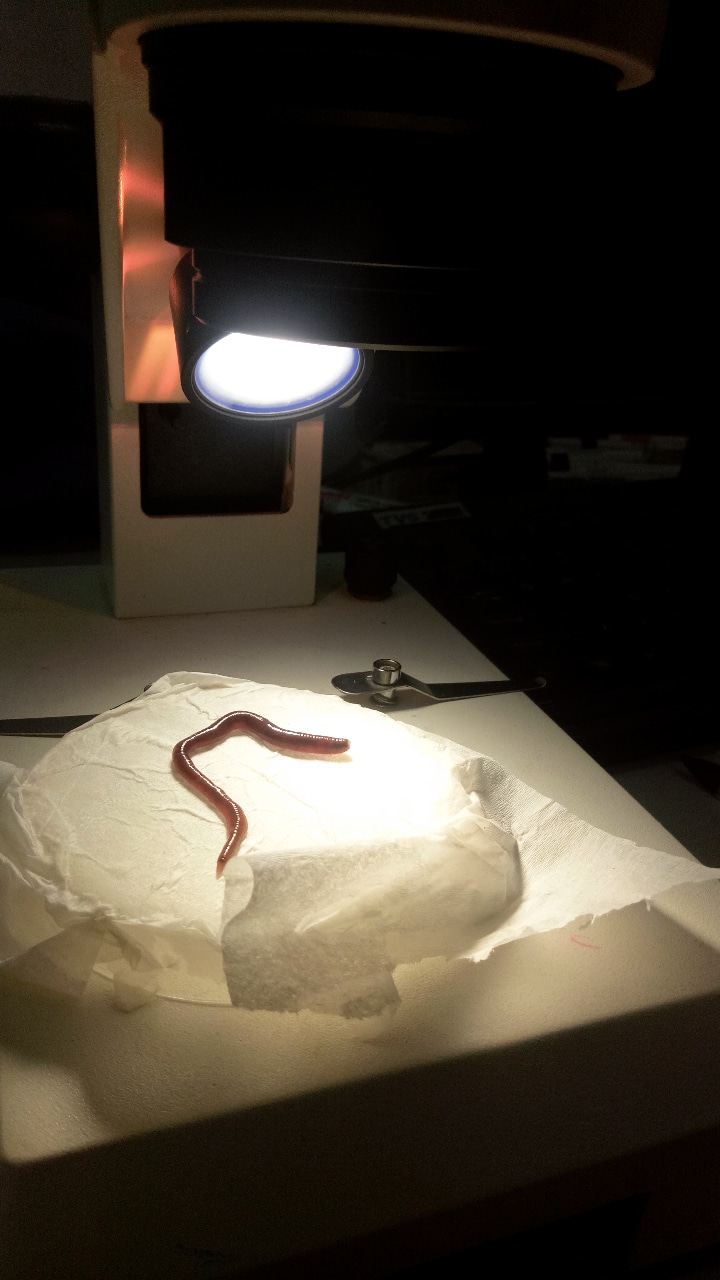
Fig 1.
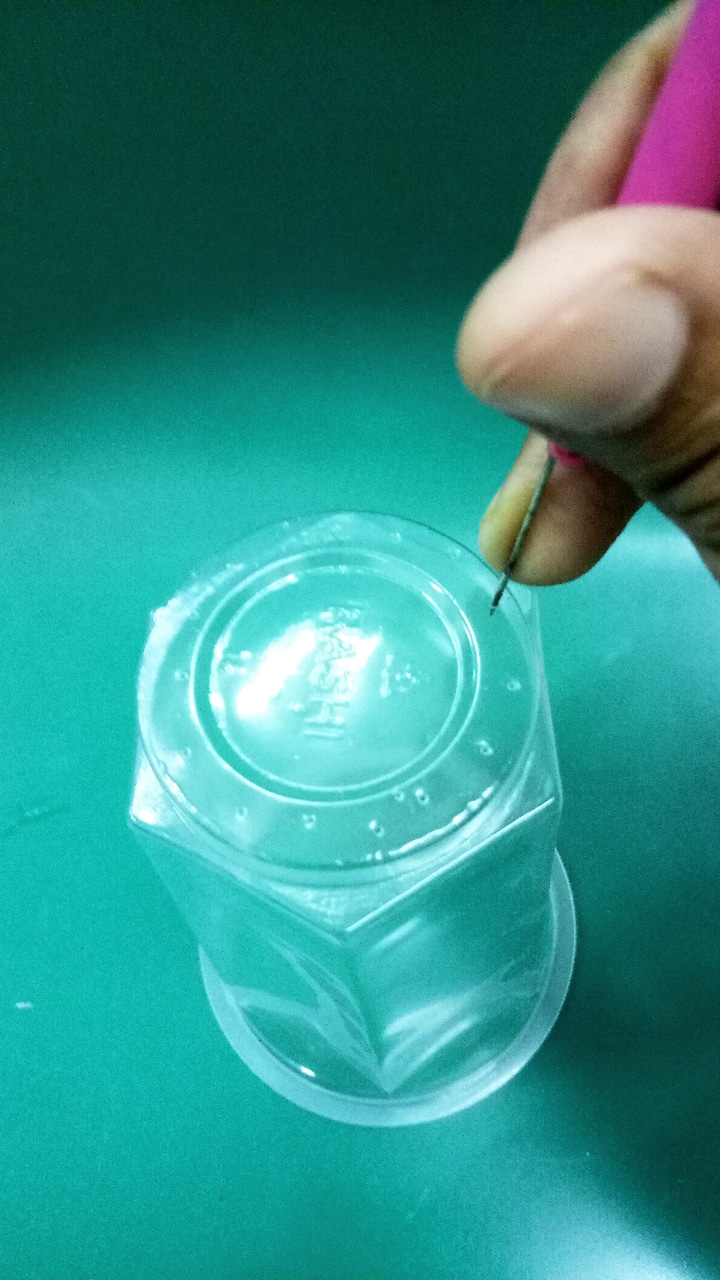
Fig2.
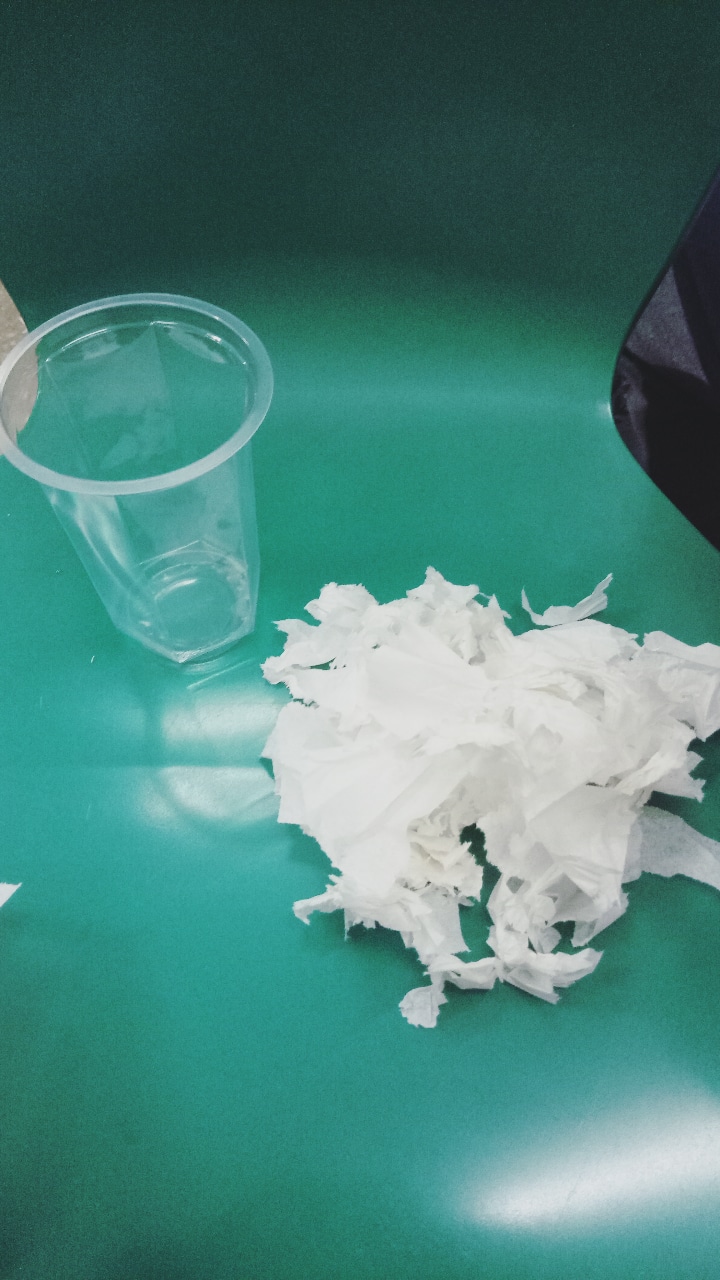
Fig3
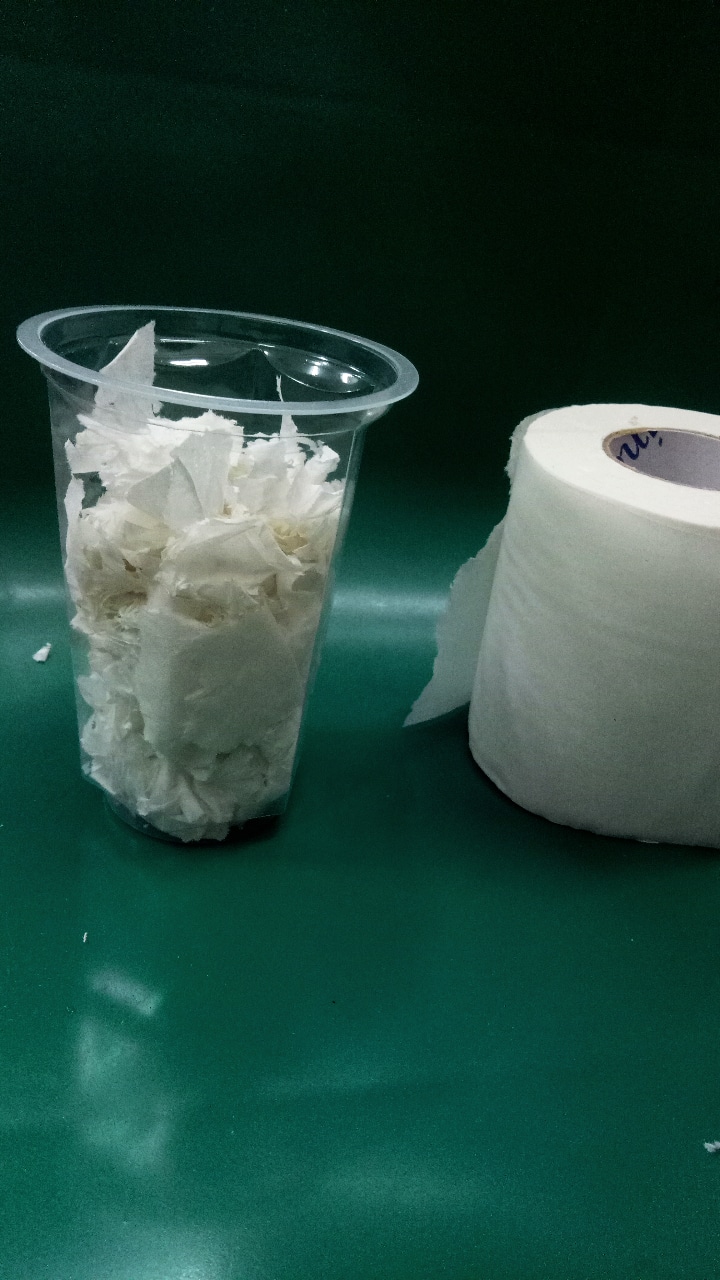
Fig4.
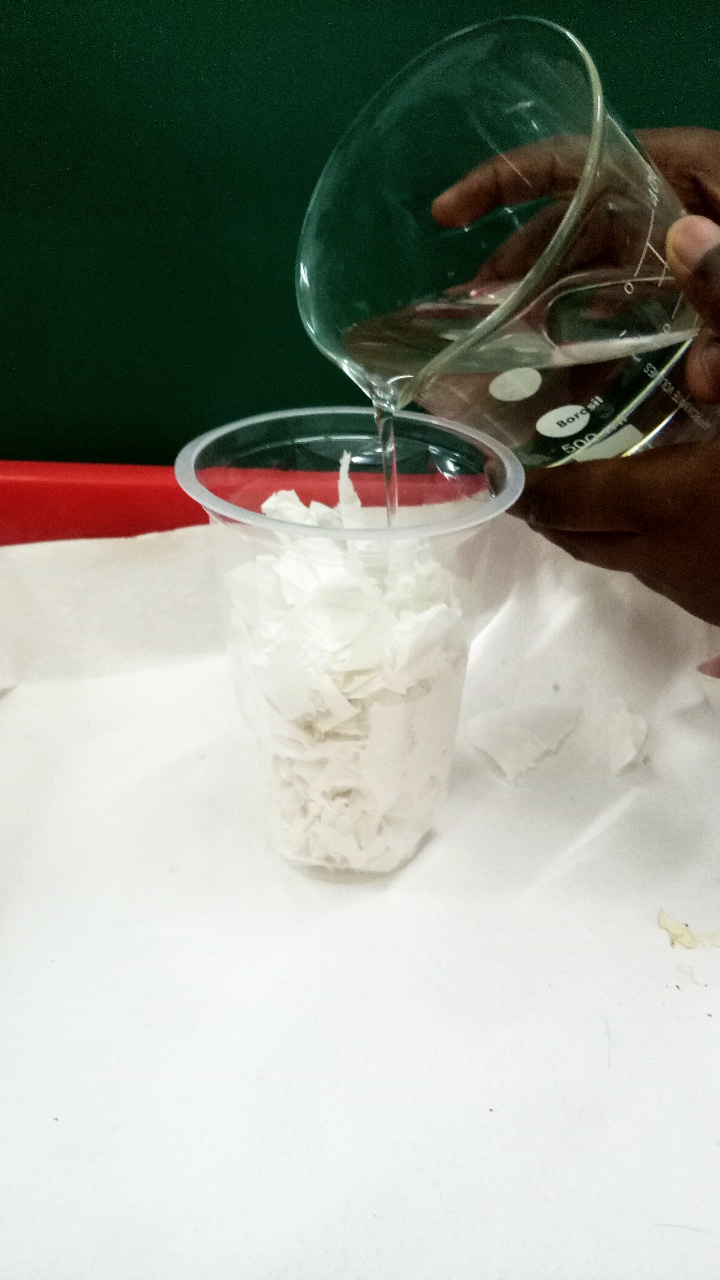
Fig5.
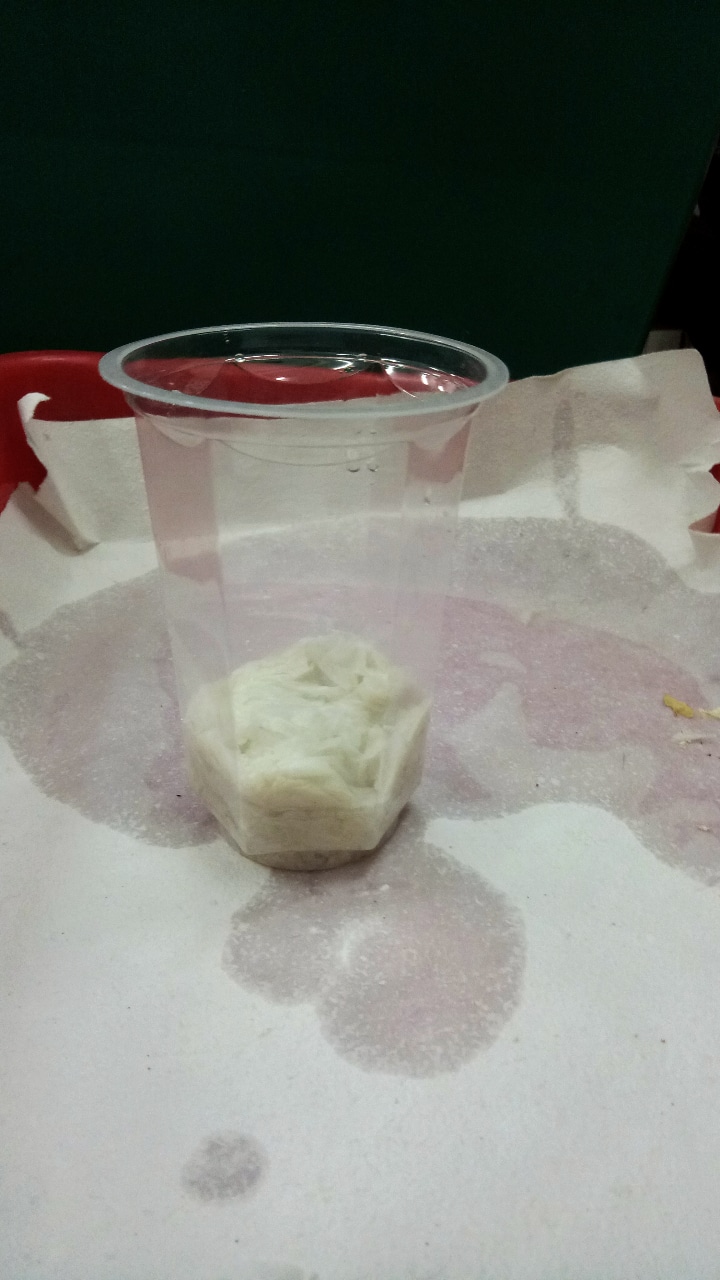
Fig6
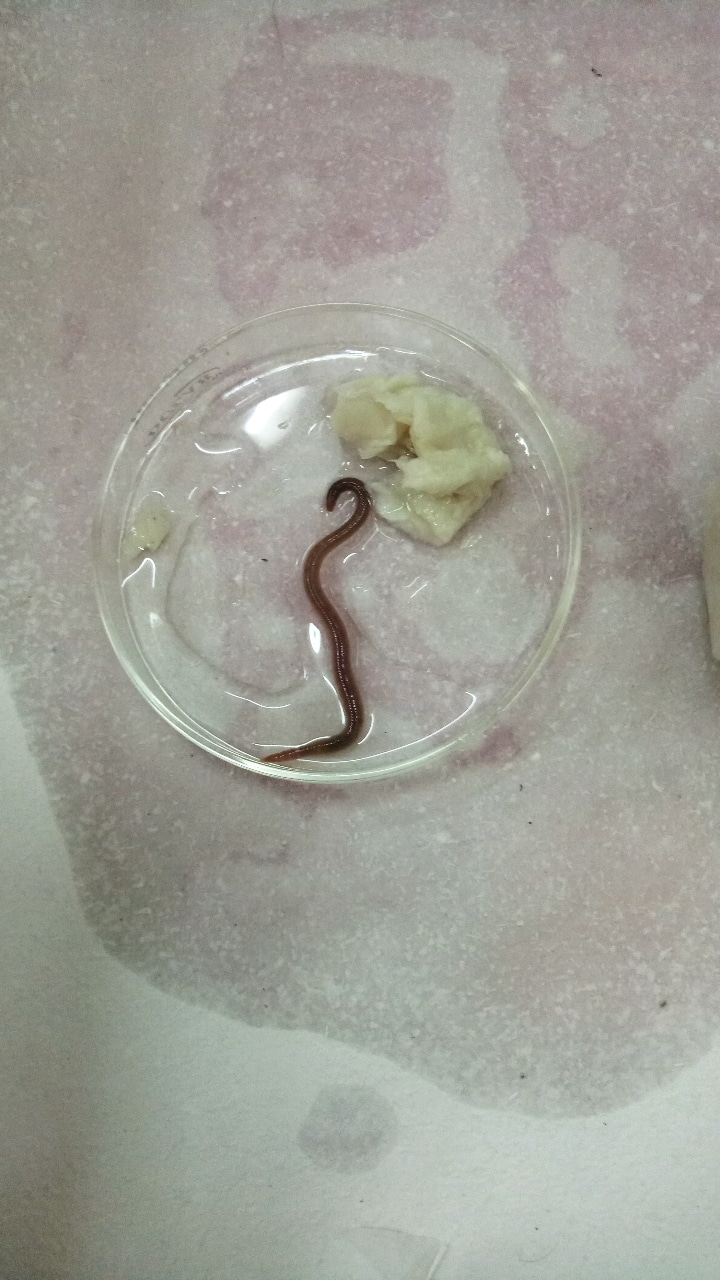
Fig7
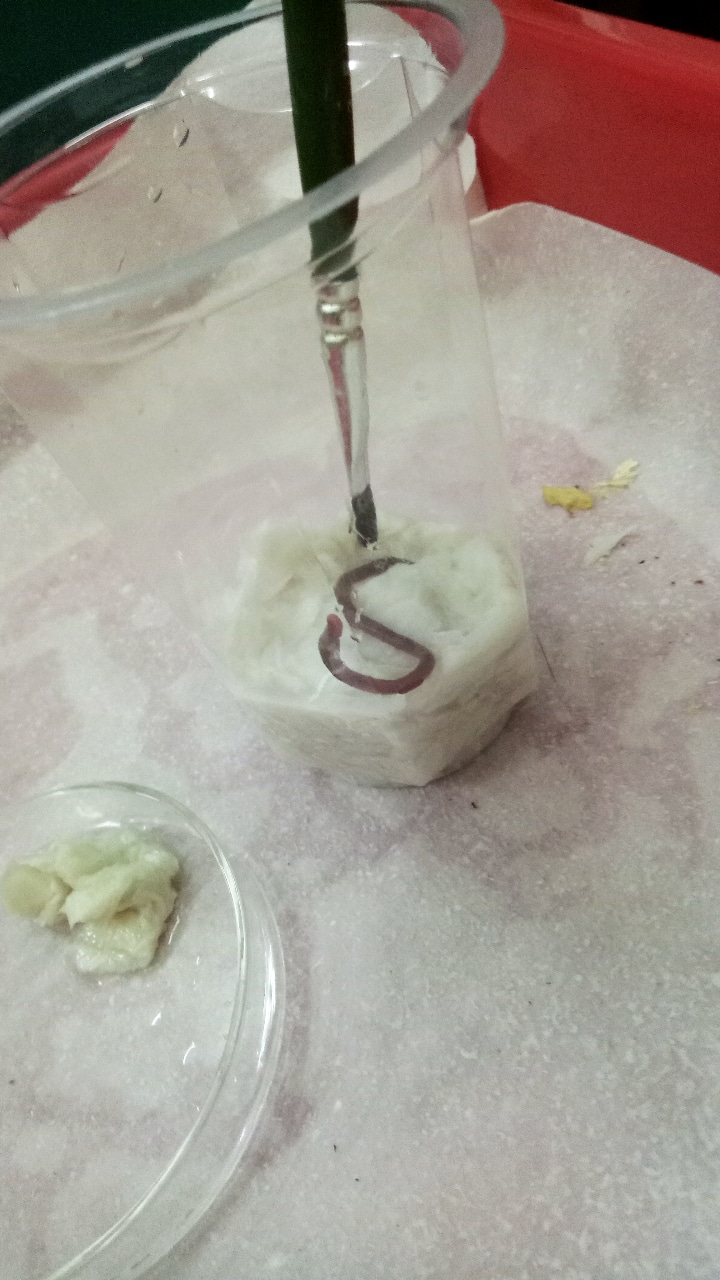
Fig8
Fig9
Ritik Baviskar, CC BY-SA 4.0, via Wikimedia Commons
Note:- There can always be an alternative for the material we have
Eg:- If you do not have plastic cups you can take a plastic bottle instead, cut it into half and make holes under it and also if you do not have a rubber band you can also use thread instead.
As we know earthworms are found in moist soil in shady areas like under trees or pots of plants, these parts of plants ( eg: leaves) fall off and degrade in soil and as the major constituent of plants is cellulose when the plant gets degraded in soil, cellulose from plants gets mixed with it and hence to provide soil like condition we are using tissue paper which also has a huge amount of cellulose as it is made by trees and adding normal tap water for moist conditions.
How do we get to know that the earthworms are really eating tissue paper?
Well if the earthworms are feeding on it, they will also defecate and hence after two days, you’ll see the feces of earthworms on the walls of the plastic cup if you observe them they will be in the shape of the rectum of earthworm and would be white in color similar as the tissue paper.
Worm Pit :-
Worm Pit is a method to culture earthworms and give them natural conditions like the soil where they live normally. It is an easy method where beds of organic substances like vegetable wastes and soil are prepared.
Material Required :-
- A plastic flowering pot with drainage holes under it or a plastic container approximately open diameter - 30 cms, depth - 17cms, height - 26 cms.
- Soil depending on the size of pot.
- Vegetable wastes depending on the size of pot.
- Coconut husk.
- Water.
- Earthworms 150-200
Method :-
- Take the container and spread and add a thin layer of coconut husk at the bottom of the container.
- Then add a layer of soil in the container and then add a layer of vegetable waste to the soil.
- Similarly again add a layer of soil and again add a layer of vegetable waste in the container.
- Follow steps 2-3 until the container is completely filled until you get the top layer of soil in the container.
- Now add water in the container until the water reaches the bottom of the container
approx: (1000ml) - Keep this container undisturbed for 7-8 days and add water to it daily. Do not add excess water.
- After 7-8 days check if the vegetable waste has degraded in the soil and has completely mixed with it by digging in a little bit in soil.
- Now if the vegetable waste has degraded completely add earthworms to the container.
And our worm pit is ready!
Sorry i lost the pictures of worm pit made by me, i will definetly share pictures when i make it next time. Stay tuned…
How do you culture your earthworm? Share your pictorial journey with us! please feel free to ask questions and share your feedbacks
Acknowledgement
I would like to thank all the collaborators of CUBE initiative, Gnowledge Lab, HBCSE whose members have been working with earthworm as a model system for ideas, feedback and inspiration.
This is part of series of popular article around the theme - “The Story of Earthworm”.
Image Attribution Ritik Baviskar, CC BY-SA 4.0, via Wikimedia Commons